Configuration
Administrators are responsible for configuring Alerts, Locations, Device Users, Network Discovery, and Call Monitoring for your own environment. These tasks are carried out through the Configuration menu in the left sidebar. Service Provider Administrators are able to manage alert subscriptions and create alert and email templates for end users via the Configuration menu in the left sidebar.
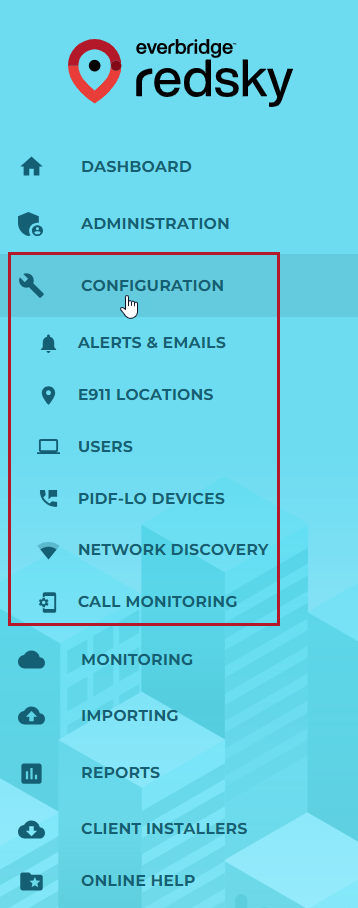
Alerts & Emails
Here is where you can set up email, SMS, or EON alerts as well as change the welcome emails for Administrators or MyE911 Users.
Alerts & Emails Permission Requirements
- User must be logged in as an Organization Administrator.
- An EON User must already be configured in the portal to receive alerts.
- Auto-Generated Welcome Emails to MyE911 Users must be toggled ON via the Organization Management page.
Add Alert Subscription
- Navigate to the Alerts & Emails page located within the Configuration menu on the left sidebar.
- Two tabs will display at the top of the window, Alert Subscriptions, and Alert & Email Templates. Ensure Alert Subscriptions is selected.
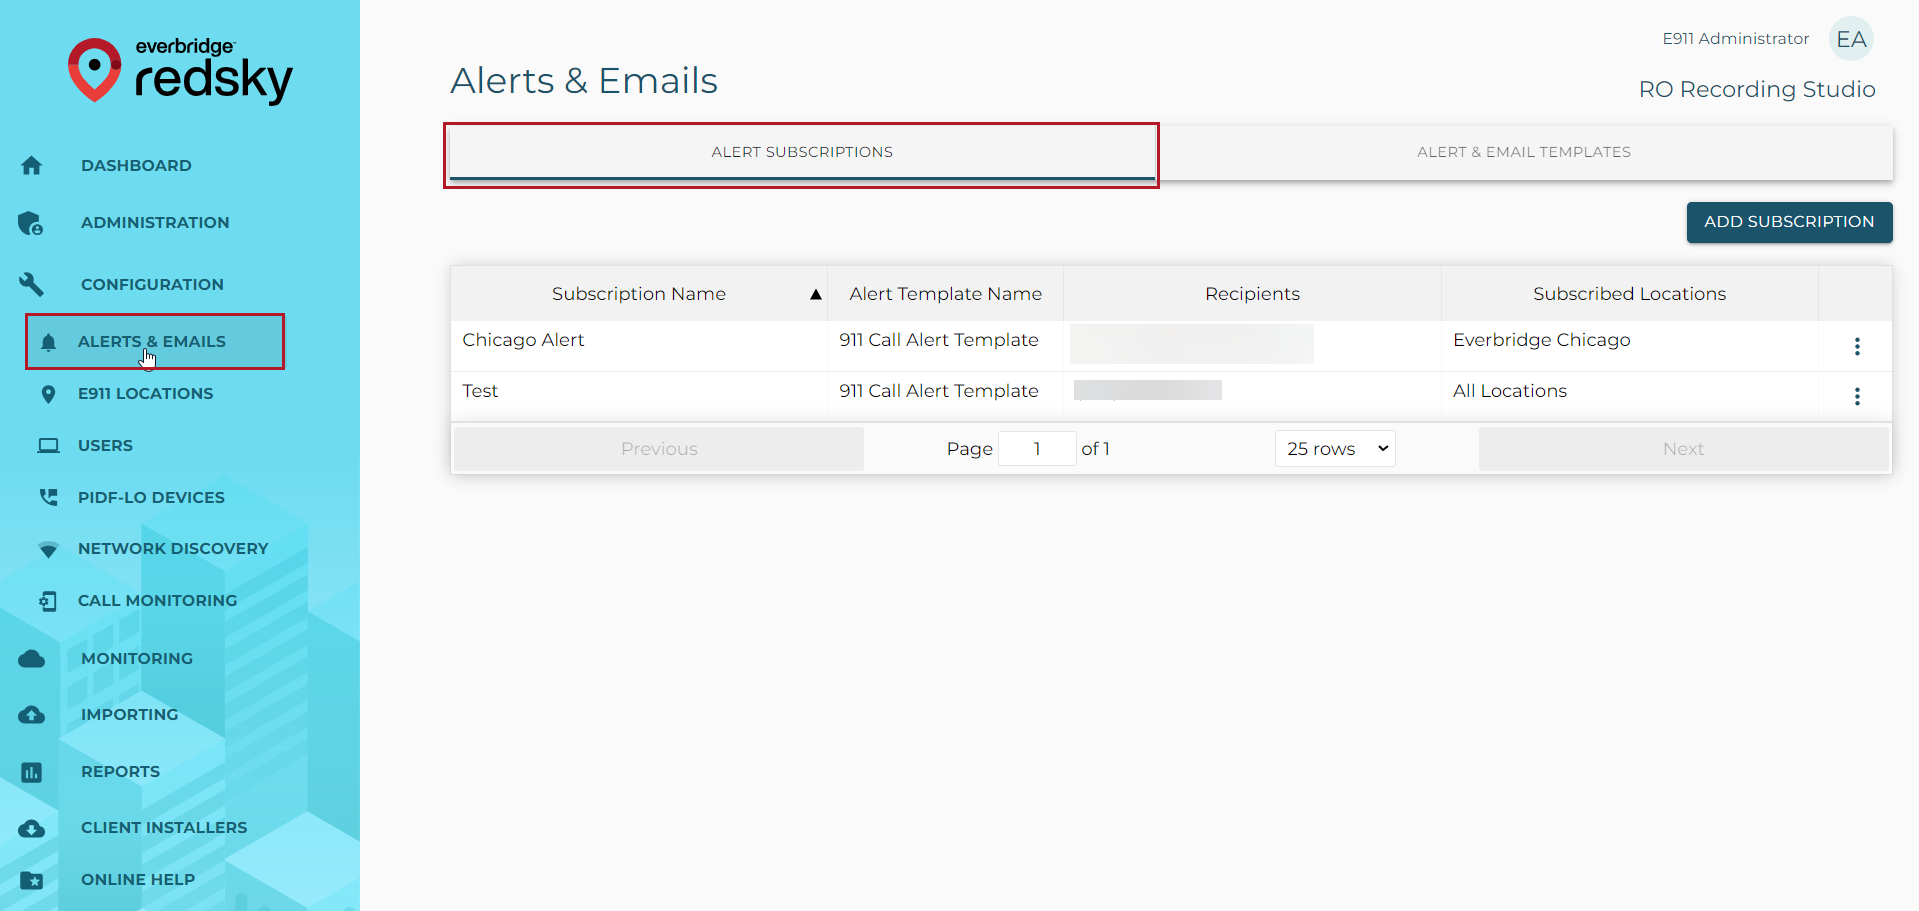
- Click the Add Subscription button in the upper-right area of the window.
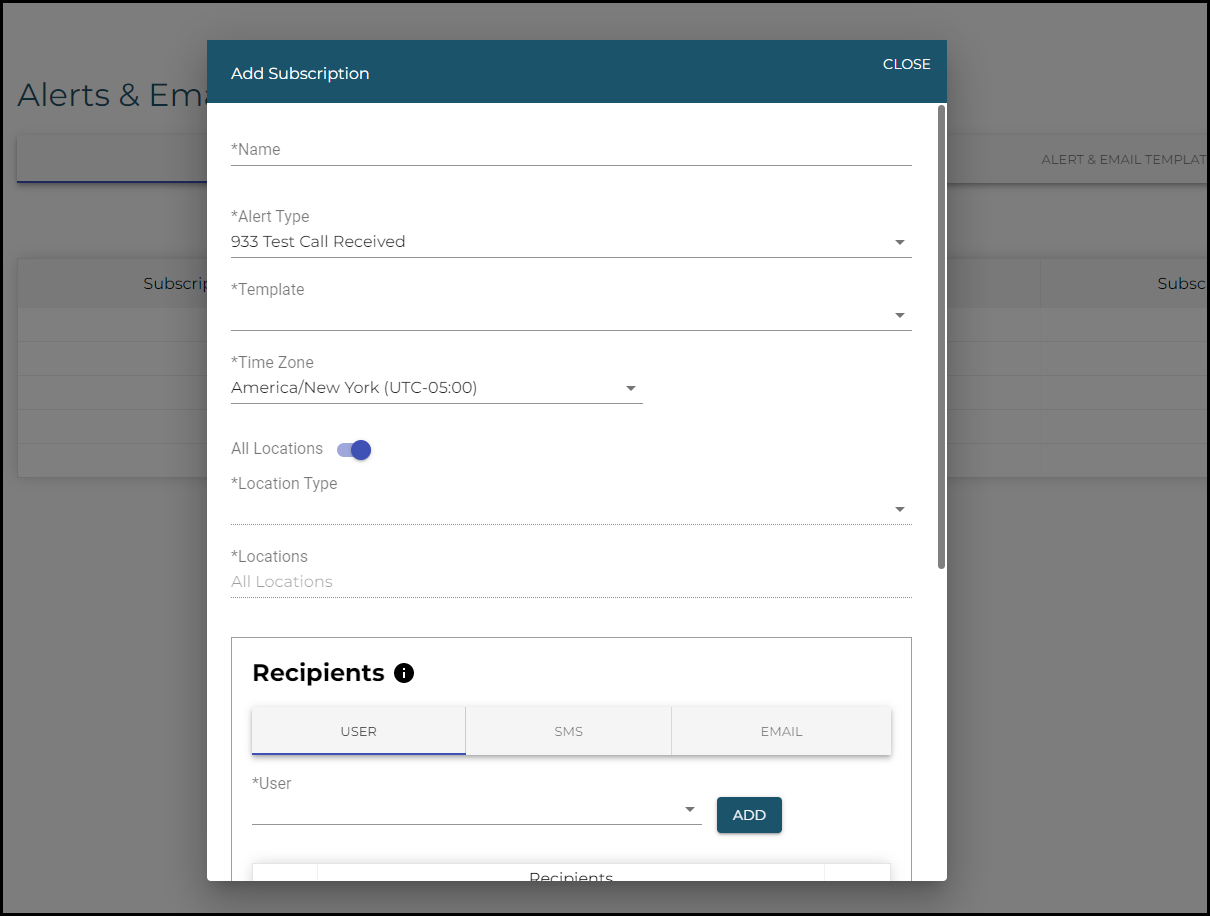
- Complete the Add Subscription dialog box with the following information:
- Name: Create a unique name for the alert subscription.
- Alert Type: Select the appropriate alert type:
- 933 Test Call Received: Alerts subscribers that RedSky received an emergency call test from the Organization.
- Undefined Network Location: Alerts subscribers that a HELD device has connected to the Organization’s network and has not defined its location.
- ECRC Emergency Call Received: Alerts subscribers that RedSky received an emergency call from the Organization that did not have an attached location. These calls are routed to an emergency call relay center, which will result in an additional charge to the Organization.
- Emergency Call Received: Alerts subscribers that an emergency call was made from the network.
- Template: Choose the alert template to be used for the body of the alert notification. Standard templates are provided, or you can create your own template (see Add Template instructions below).
- Time Zone: Select the time zone in which you would like the alert information to display.
- Buildings/Locations: This area only displays when "933 Test Call Received" or "Emergency Call Received" is selected as the Alert Type.
- The Organization's selected Location Hierarchy Type (Location-only or Building and Location) will determine if the field displays as "Location" or "Building", respectively.
- If the All Locations/Buildings toggle is selected ON, an alert notification will send to all subscribers when an emergency call is made from any of the organization's Locations or Buildings.
- If the toggle is selected OFF, alerts can be sent to specific Locations or Buildings.
- Recipients: Add EON Users, SMS numbers, or email addresses for desired alert recipients
- User Tab: Select an EON User from the dropdown list and click Add. EON Users will appear in the dropdown list only if they have already been added in the portal as such. (refer to section 2.1).
- SMS Tab: Enter a recipient’s SMS phone number, then click Add.
- Email Tab: Enter a recipient’s email address, then click Add.
- Click Save.
Edit Alert Subscription
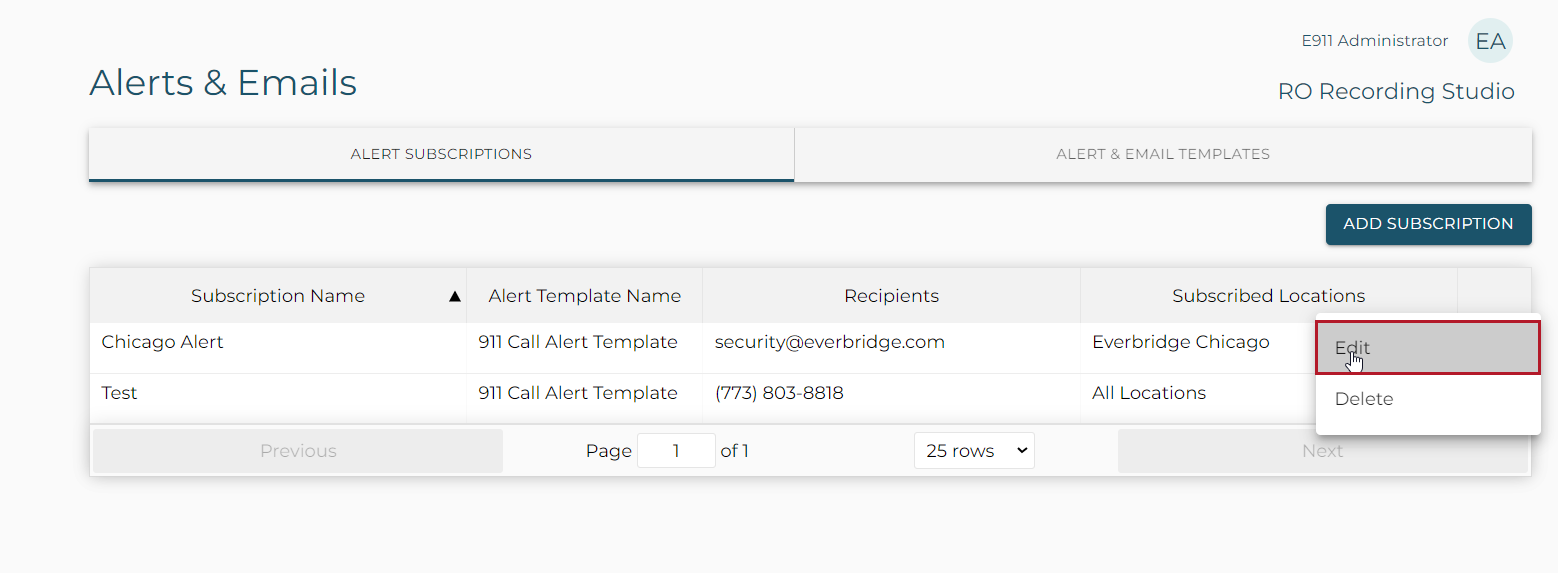
- Select Edit from the action menu on the right side of the desired Alert Subscription.
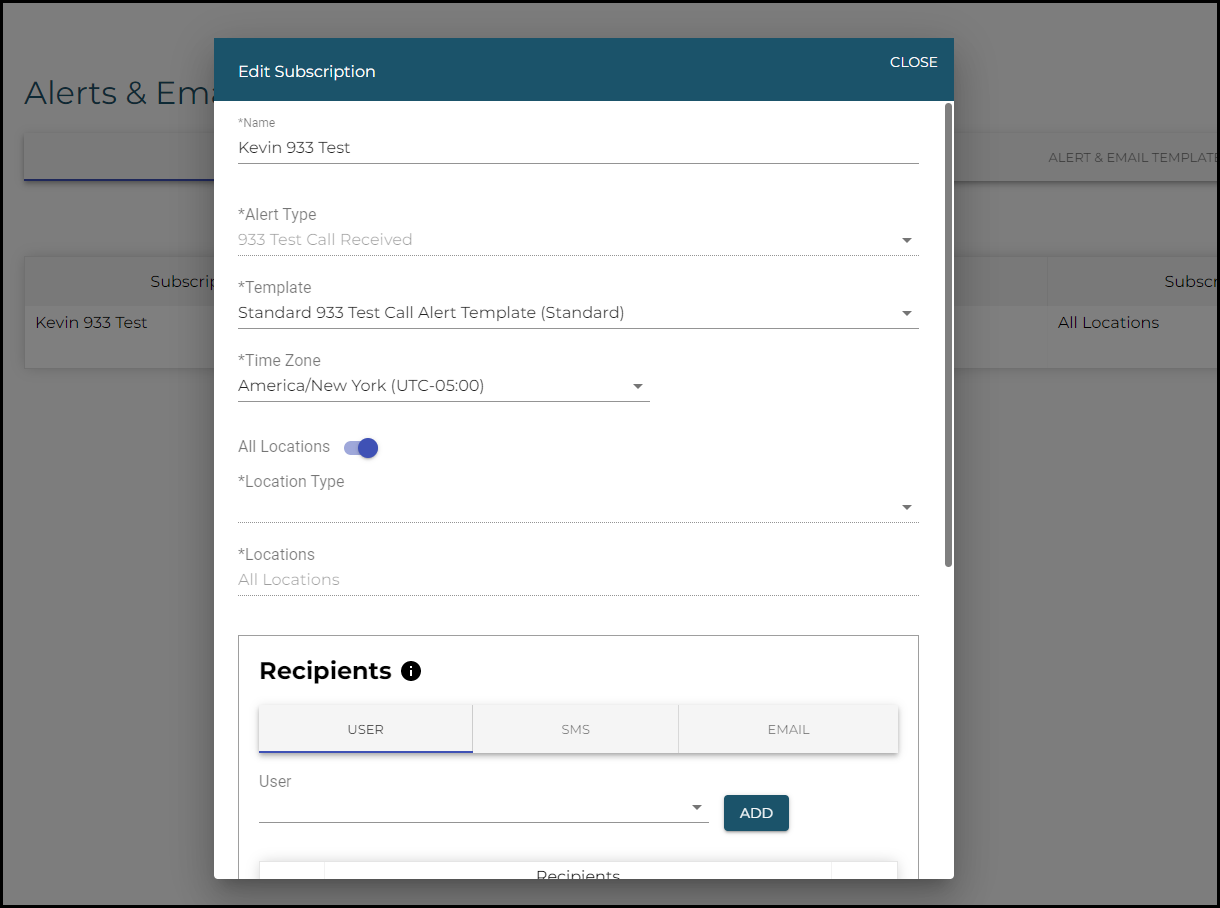
- The Edit Subscription dialog box will display. The Organization Administrator can edit the following fields:
- Name
- Template
- Time Zone
- Buildings/Locations fields
- Recipients
- Click Save when finished.
Delete Alert Subscription
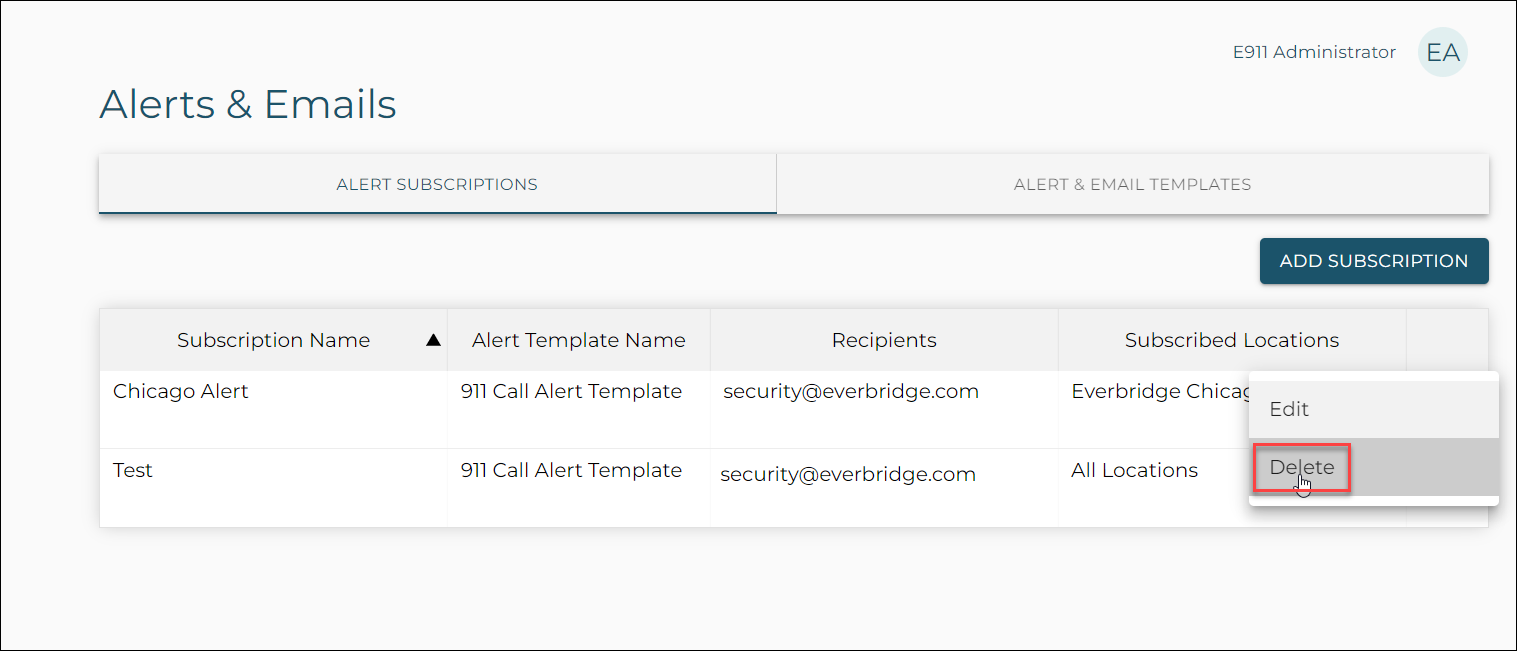
- Select Delete from the action menu on the right side the desired Alert Subscription.
- Click Delete in the dialog box to confirm.
Alert & Email Templates
Create New Alert/Email Template
- Select the Alert & Email Templates tab at the top of the Alerts & Emails page.

- A list of alert and email templates will display, with Template Name, Alert/Email Type, and Type shown for each template. The following default Alert and Welcome Email templates will be available:
- Standard ECRC Emergency Call Alert Template
- Standard Undefined Network Location Template
- Standard Emergency Call Alert Template
- Standard 933 Test Call Alert Template
- Standard MyE911 User Welcome Email Template
- A list of alert and email templates will display, with Template Name, Alert/Email Type, and Type shown for each template. The following default Alert and Welcome Email templates will be available:
- Click the Add Template button in the upper-right area of the window.
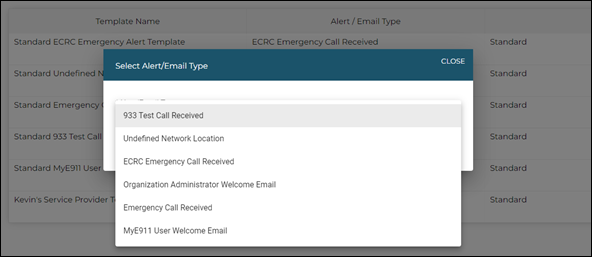
- Choose your desired template from the drop-down list in the dialog box that appears.
- Click Save.
- The Add Template dialog box will open and will display the diagram for the selected Template.
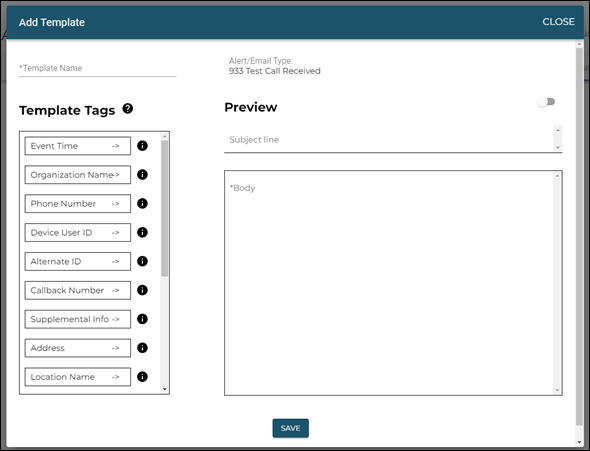
- Complete the following fields:
- Template Name
- Subject Line
- Body
- Complete this field by dragging items from the Template Tags section of the dialog box into the Body section as required. Hover your mouse pointer over the "?" icon adjacent to the Template Tags header for an on-screen demo of this process.
- Add any additional text to the Body as required.
- To preview your alert or email, toggle the Preview button ON.
- Click Save when finished.
Copy a Template
Users can copy an existing template to modify, instead of creating an entirely new template.
- Select Copy from the menu at the right side of the Alerts & Emails display for a given template.

- Provide a name for the copied template in the Template Name dialog box that and click Save.
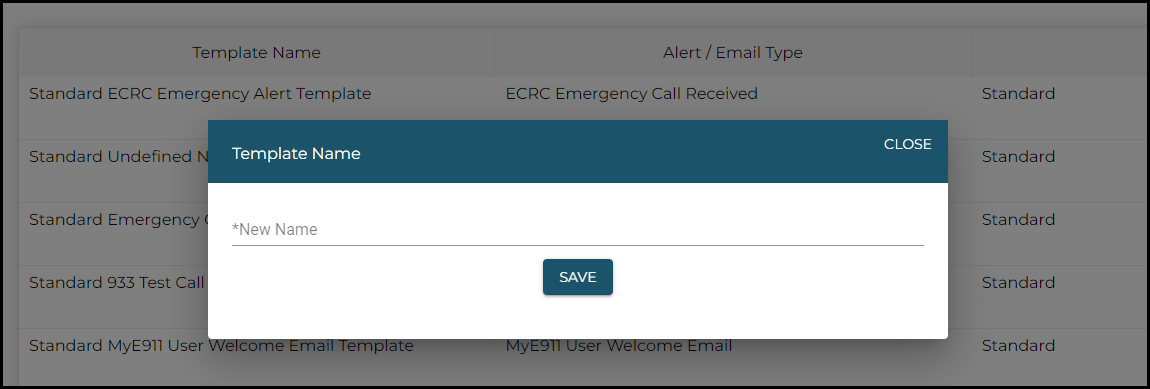
- The copied template will appear in the template list and be specified as User-Defined in the Type column.
Edit a Template
Admins can edit User-Defined templates to suit their specific needs.
- Select Edit from the menu at the right side of the Alerts & Emails display for a given template.

- Edit the following fields as needed:
- Template Name
- Subject Line
- Body
- Click Save when finished.
Preview a Template
- Select Preview from the menu at the right side of the Alerts & Emails display for a given template.

- A pop-up window will display, showing a preview of the alert.

Delete a Template
- Select Delete from the menu at the right side of the Alerts & Emails display for a given template.
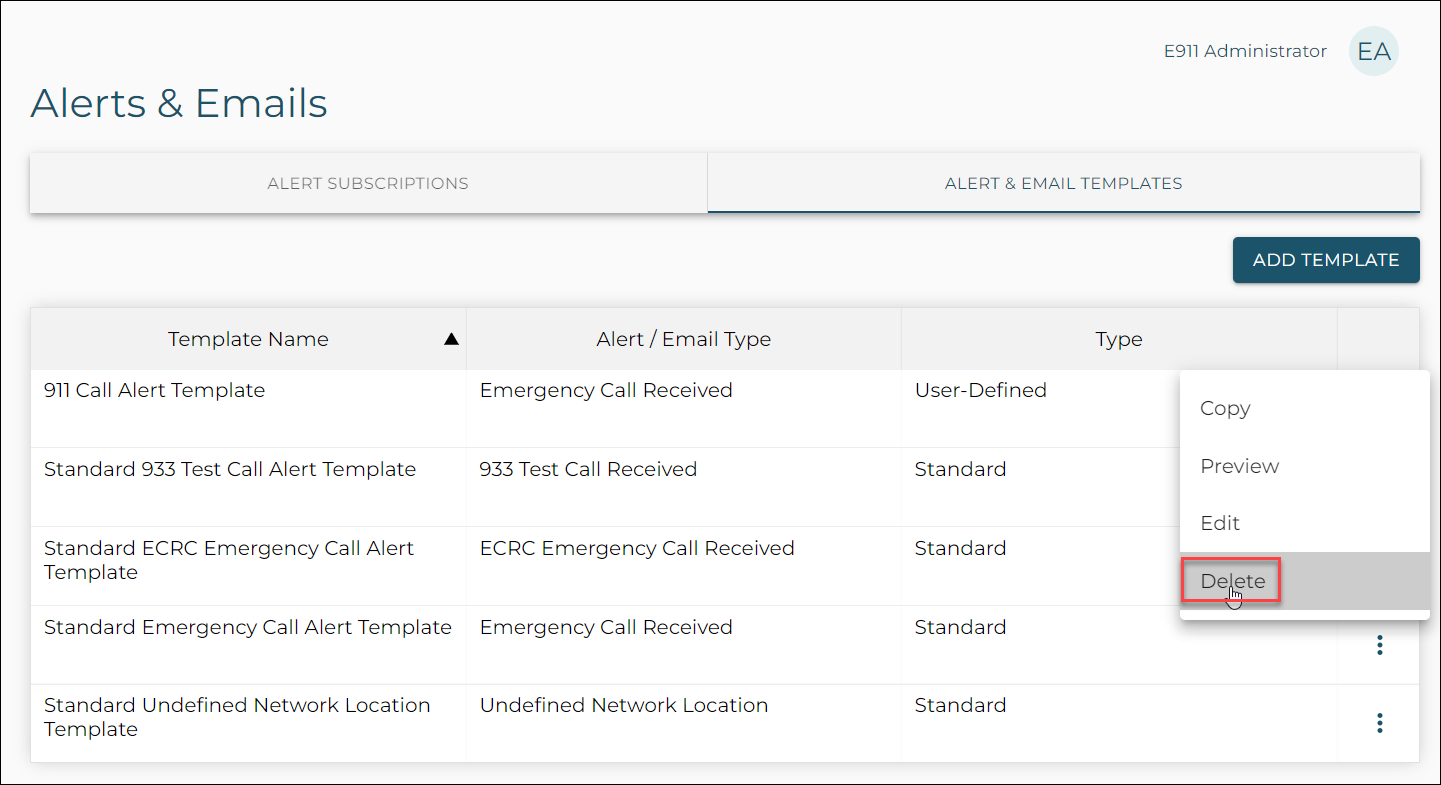
- Click Delete in the dialog box that appears.
Locations
In order for your Organization’s 911 calls to automatically provide enhanced location information to 911 Dispatchers, you must configure your Organization’s Locations repository within the portal. The information that will be displayed at a PSAP is the Building Address, Location Information, Phone Number, and Company Name. Supplemental Information can also be sent but each PSAP may or may not display this information. Live testing will need to be conducted to ensure supplemental information is displayed.
Locations that are entered manually or imported are viewable via the E911 Locations page within the Configuration menu.
Locations in RedSky are categorized within the following Location Hierarchy Types:
- Building and Location
- Location Only
These Hierarchy Types are configured by a RedSky Administrator or Reseller (if applicable) during initial set up. Contact RedSky or your Reseller if you are unsure of your Location Hierarchy Type.
Locations Permission Requirements
- User must be logged in as an Organization Administrator.
"Building and Location" Location Hierarchy Type
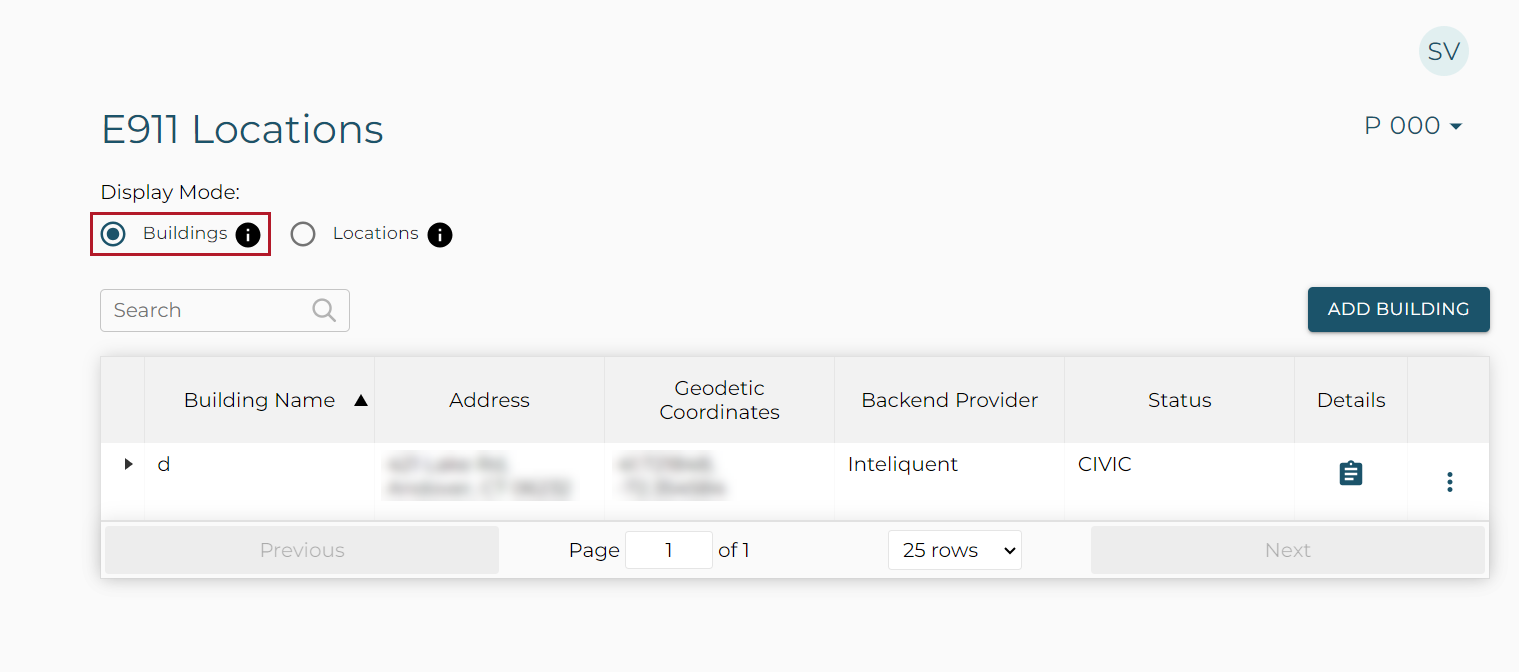
View Buildings and Locations
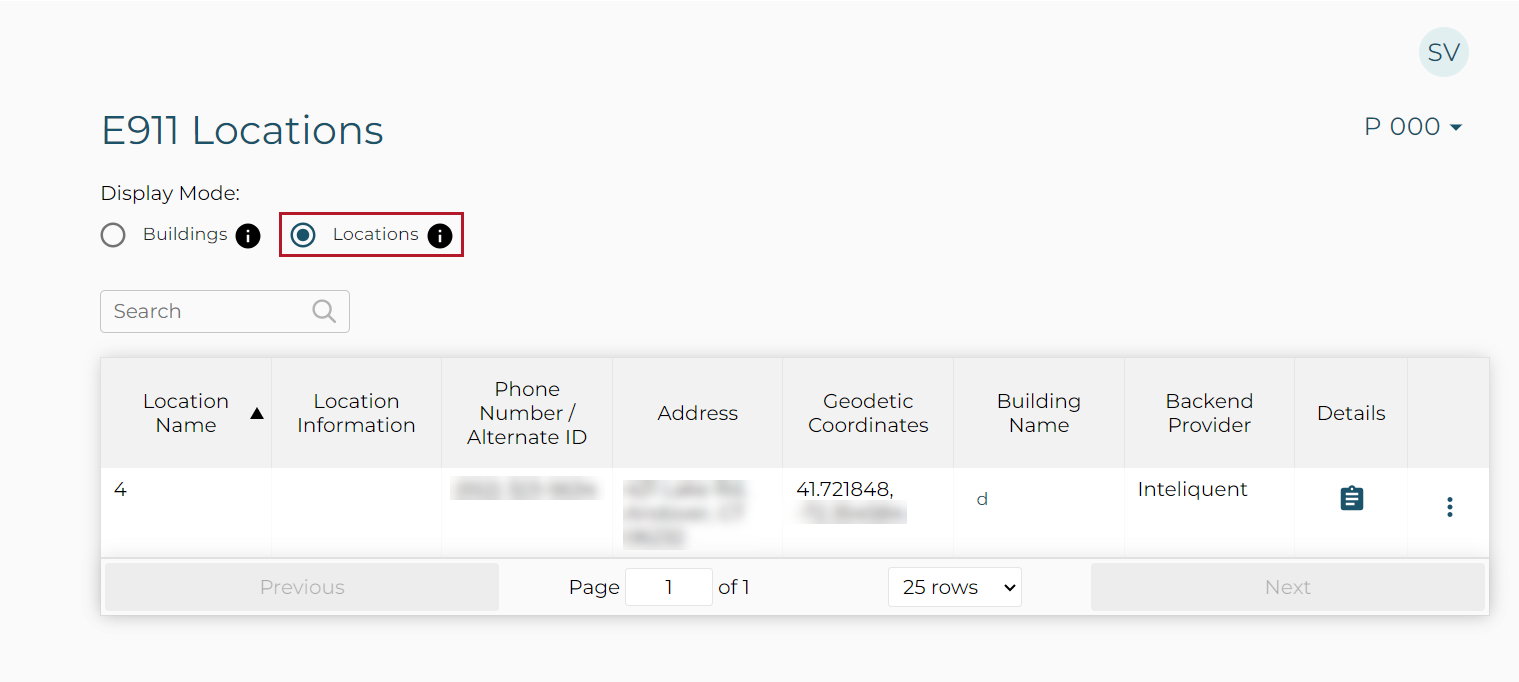
Navigate to the E911 Locations page located within the Configuration menu. In Display Mode: Buildings, a table will display the Building Name and Address. In Display Mode: Locations, a table will display the Location Name, Location Information, Phone Number, Address, and Building Name. More details about a Building can be viewed by selecting the icon in the Details column for a given Building or Location entry.
Add a Building via Address
A Building contains Locations that share a common civic address. Add a Building for each civic address you would like to add Locations under.
- Click the Add Building button at the top-right corner of the Locations page.
- Make sure that you're on the Address tab.
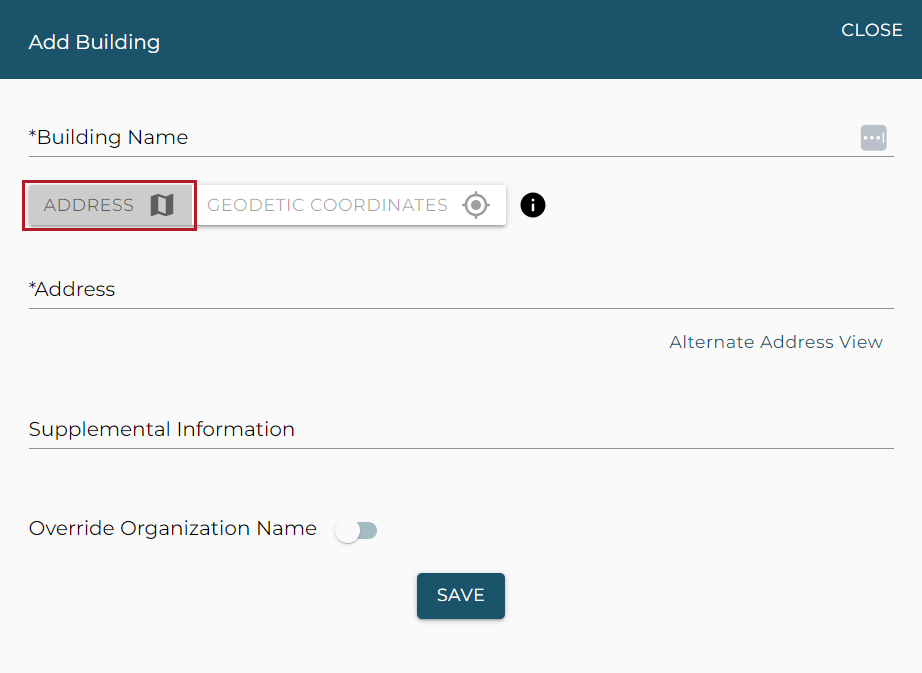
- Fill out the following information:
- Name
- Address
- Supplemental Information
- Click Save.
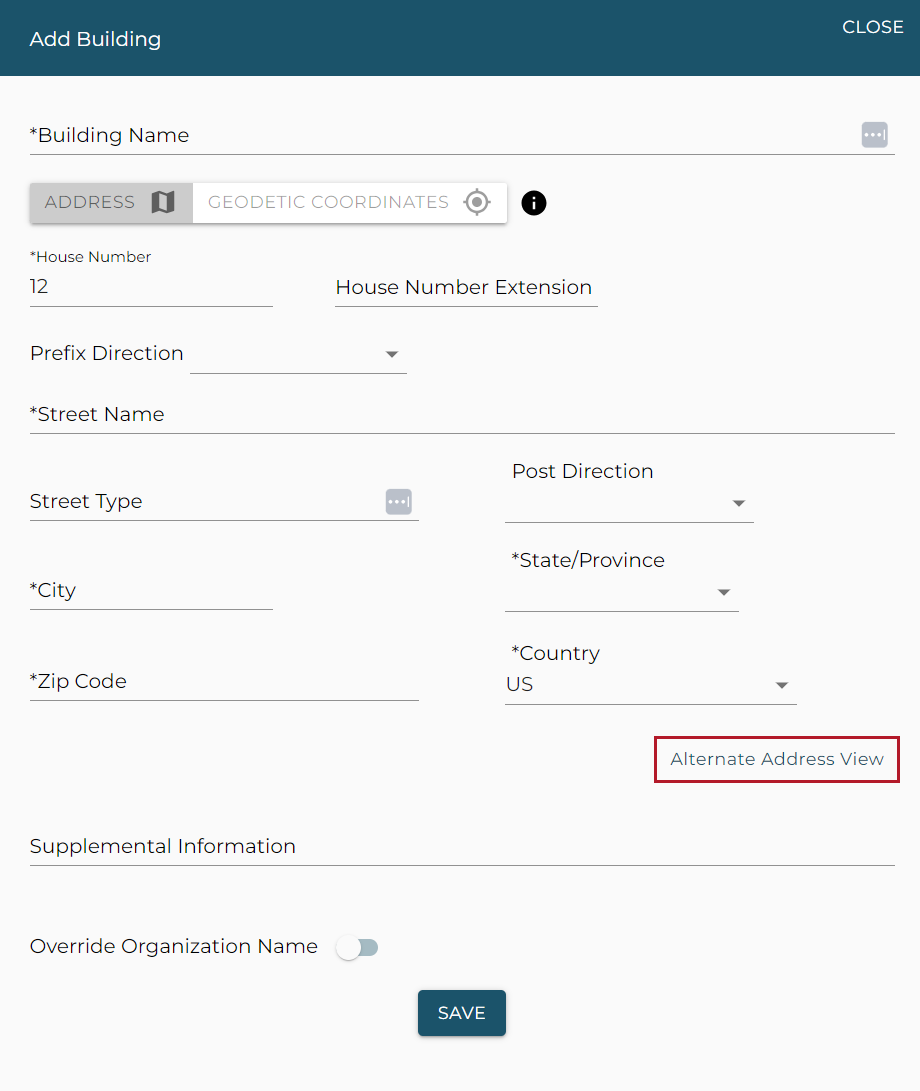
If there are more details to add for a Building than what's included on the default Address View, click Alternate Address View to toggle to a more robust form.
Add a Building via Geodetic Coordinates
If a Building doesn't have a designated street address, like for a utility shed, it can be added via Geodetic Coordinates.
- Click the Add Building button at the top-right corner of the Locations page.
- Switch to the Geodetic Coordinates tab.
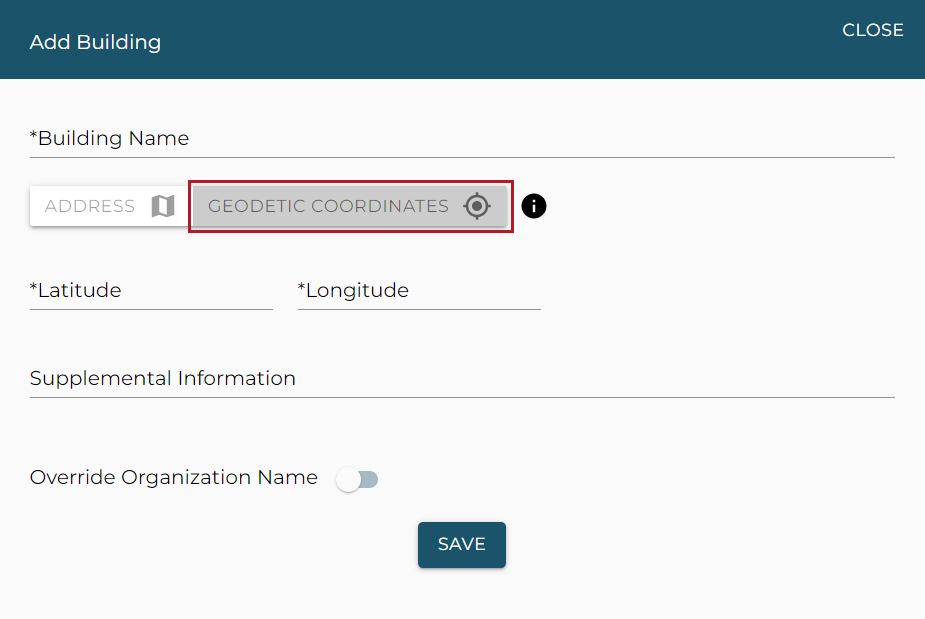
- Enter the following details:
- Building Name
- Latitude
- Longitude
- Supplemental Information
- Click Save.
Edit a Building
- Select Edit from the Building’s action menu.
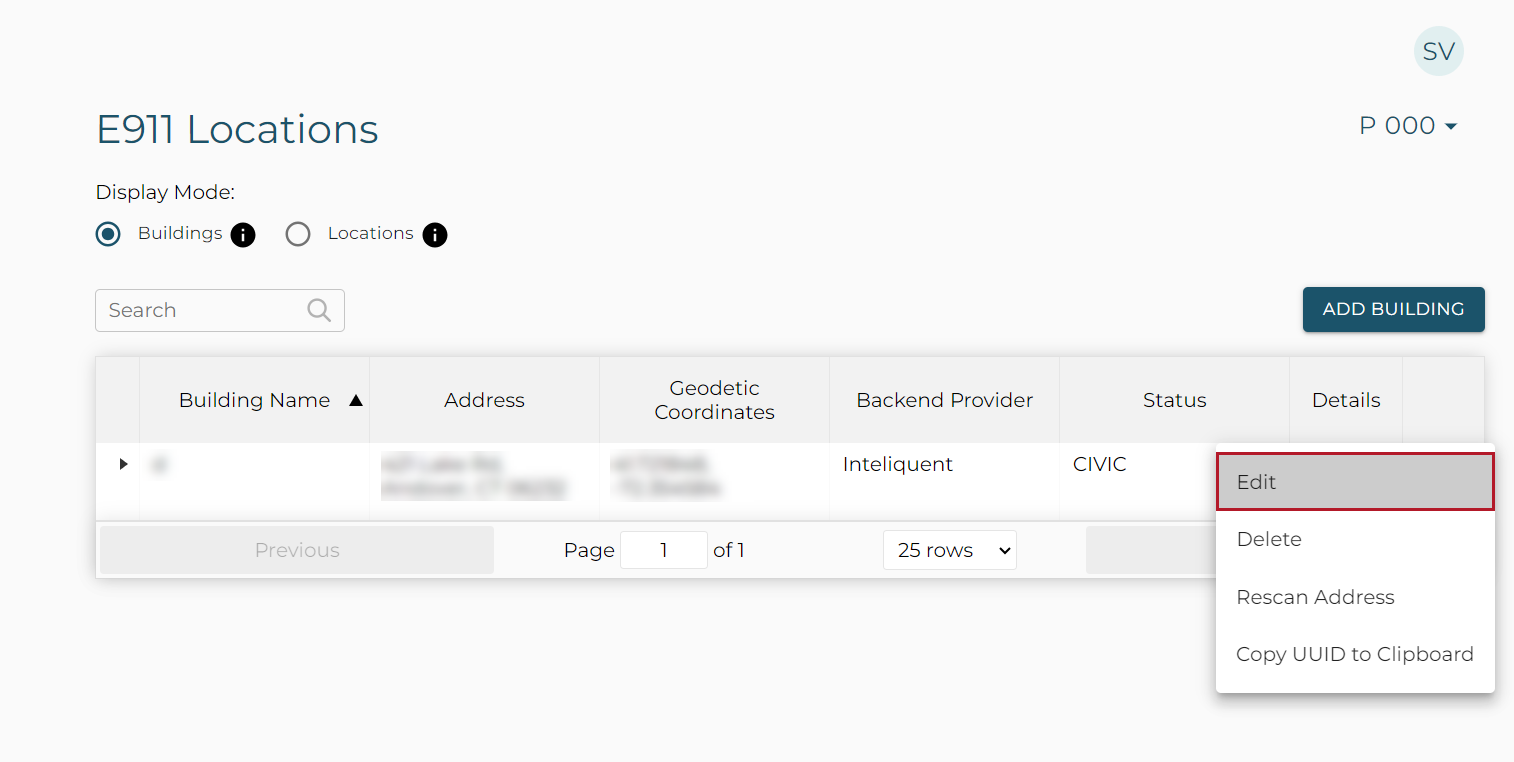
- Make whatever changes are necessary.
- Click Save.
Delete a Building
- Select Delete from the Building’s action menu.
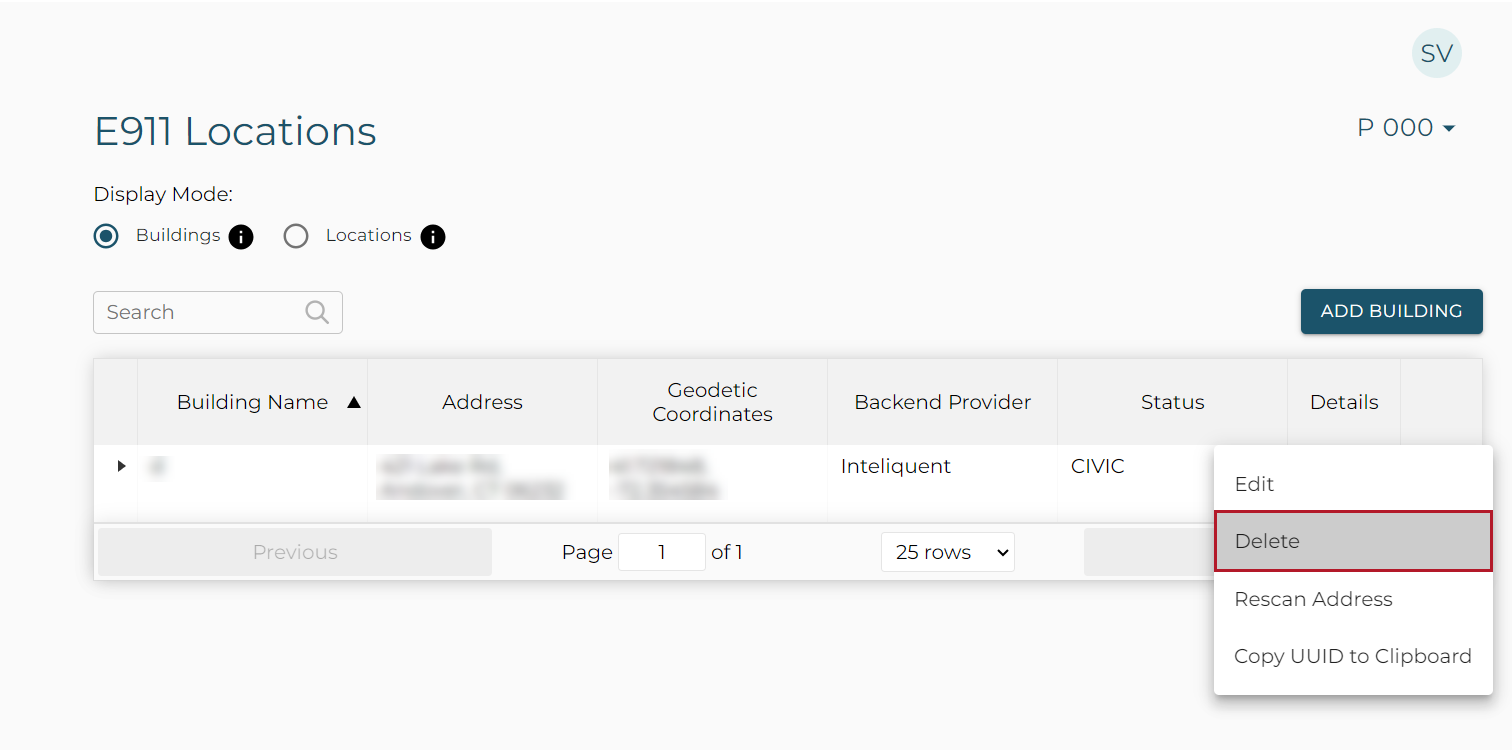
- Click Delete in the dialog box that displays.
Add a Location to a Building
- Click the button to the left of the Building entry for which you want to add a Location.
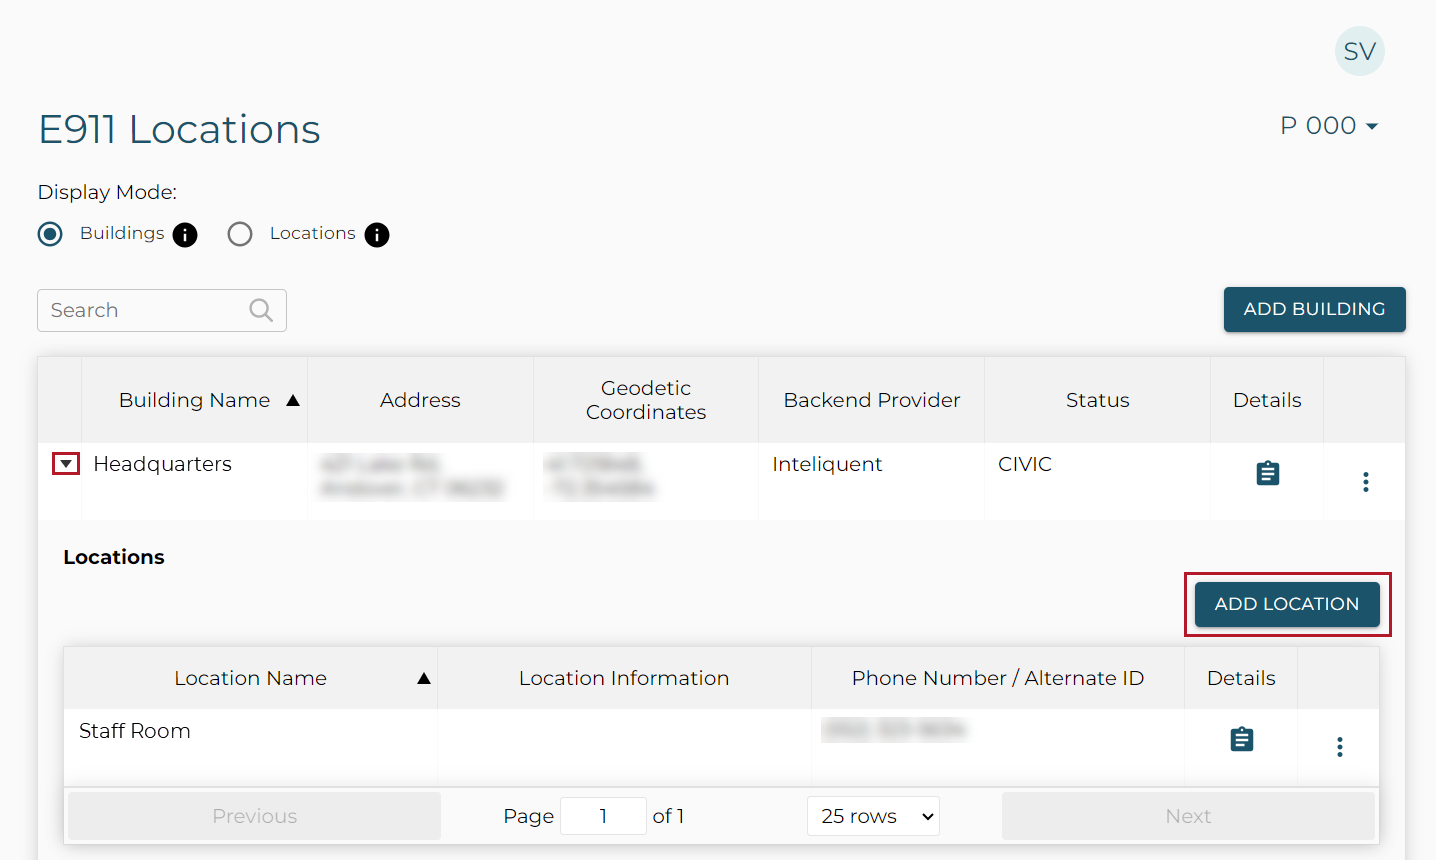
- Click the Add Location button at the top right of the Locations area of the table.
- Complete the following fields as required:
- Identification Type: Select Alternate ID if the Location does not use a phone with a traditional direct inward dial (DID) phone number.
- Name: Enter a unique name for the Location.
- Phone Number/Alternate ID: This field displays depending on the Identification Type chosen.
- Do not provide a Phone Number or Alternate ID for a Location if the Location will be tied to a Network Discovery element.
- Callback Number: Enter a callback number. It will override the callback number if provided by the phone system at the time of the call.
- Location Information: Enter the floor, room number, suite number, or apartment number that corresponds to the Location.
- Note that while the Location Information field supports up to 60 characters, not all PSAPs support more than 20 characters.
- HTML Link URL: This is used to provide additional notification information. A link placed here can be used to provide a mapping display, an image, or additional Location-specific information.
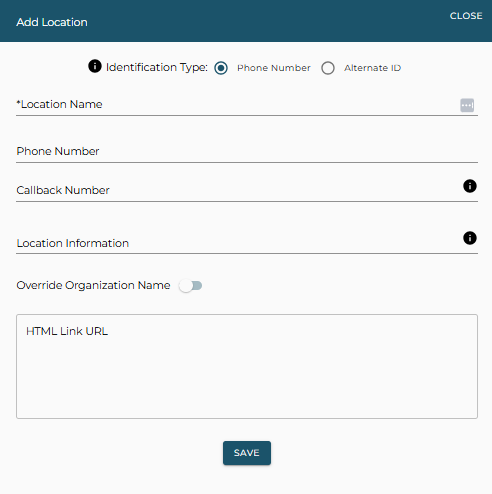
- Click Save.
Note that selecting the Override Organization Name button ON allows you to provide a different name for the building, or additional information that will appear at the PSAP when a 911 call is placed from any of its locations.
Alternate Location Identification
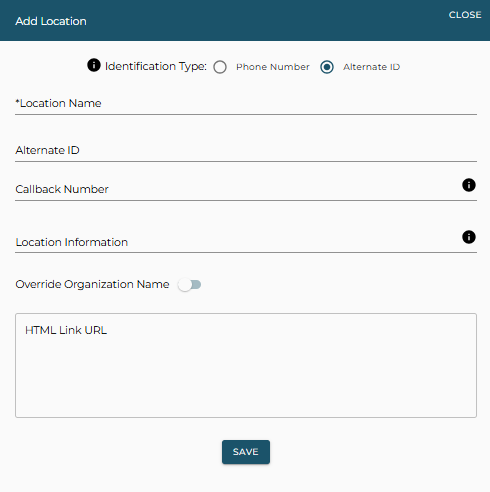
If your Organization is configured to use Alternate Location Identifiers instead of DID phone numbers, alternate fields will display in the Add Location dialog box. The Administrator can configure the Location with an alternate means of identification such as a phone extension. The portal will use this alternate identifier to discover which telephony device placed the call, determine the caller’s current location, and route the call to the appropriate PSAP. If an alternate identifier is used, a callback phone number must be provided in the event the initial 911 call disconnects for any reason. This option is only available via SIP Trunk connectivity.
When using Alternate ID, the Add Location dialog box will display with the following format:
Edit a Location
- Select Edit from the Location’s action menu.
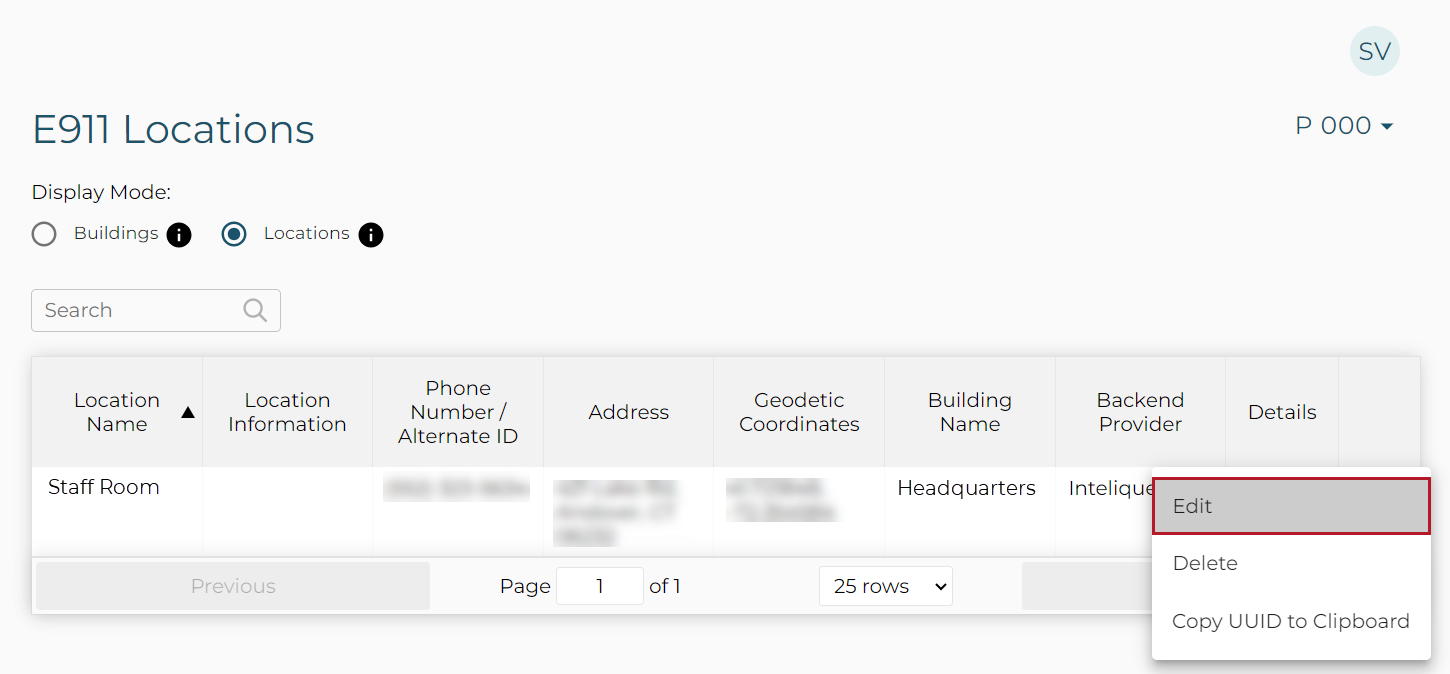
- Make changes to the following fields as needed:
- Name
- Phone Number
- Location Information
- Organization Name (if Override Organization Name is selected ON)
- HTML Link URL
- Click Save.
Alternate Location Identification
If your Organization is configured to use Alternate Location Identifiers instead of DID phone numbers, an Alternate ID field will display in place of the Phone Number field in the Edit Location dialog box.
Delete a Location
- Select Delete from the Location’s action menu.
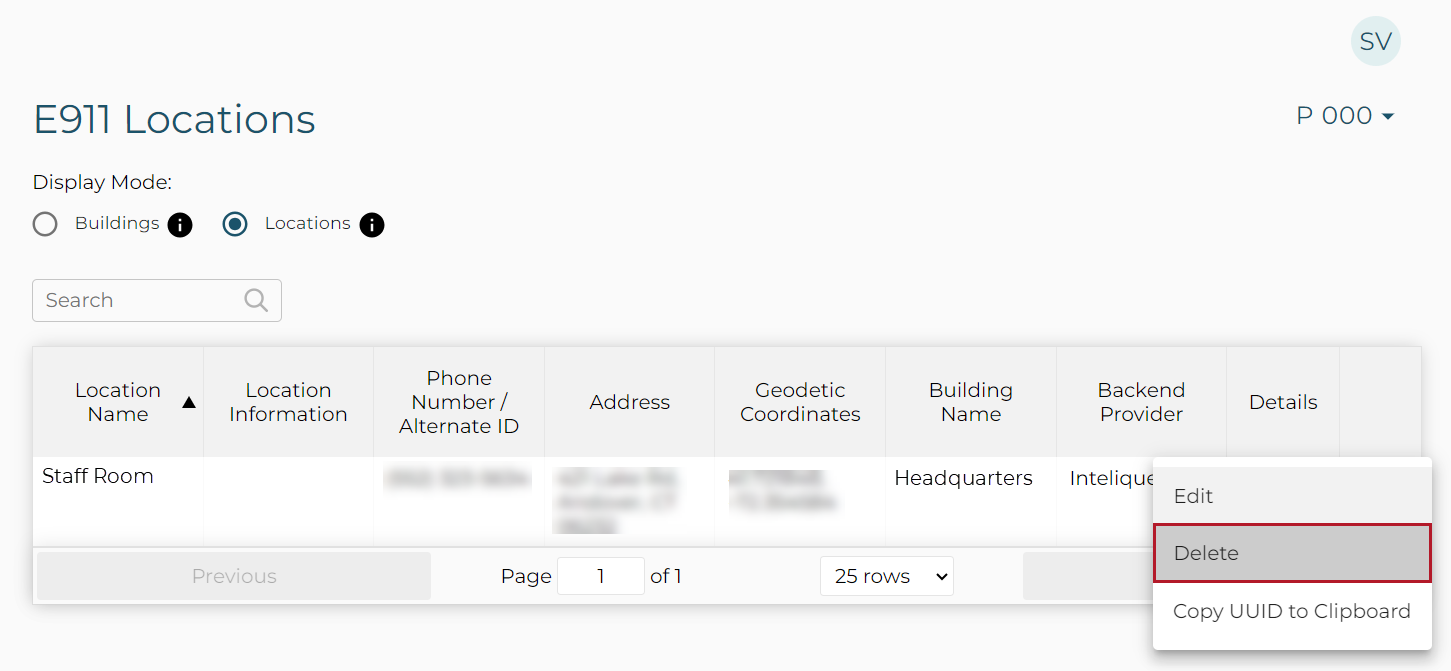
- Click Delete in the dialog box that displays.
"Location Only" Location Hierarchy Type
View Locations
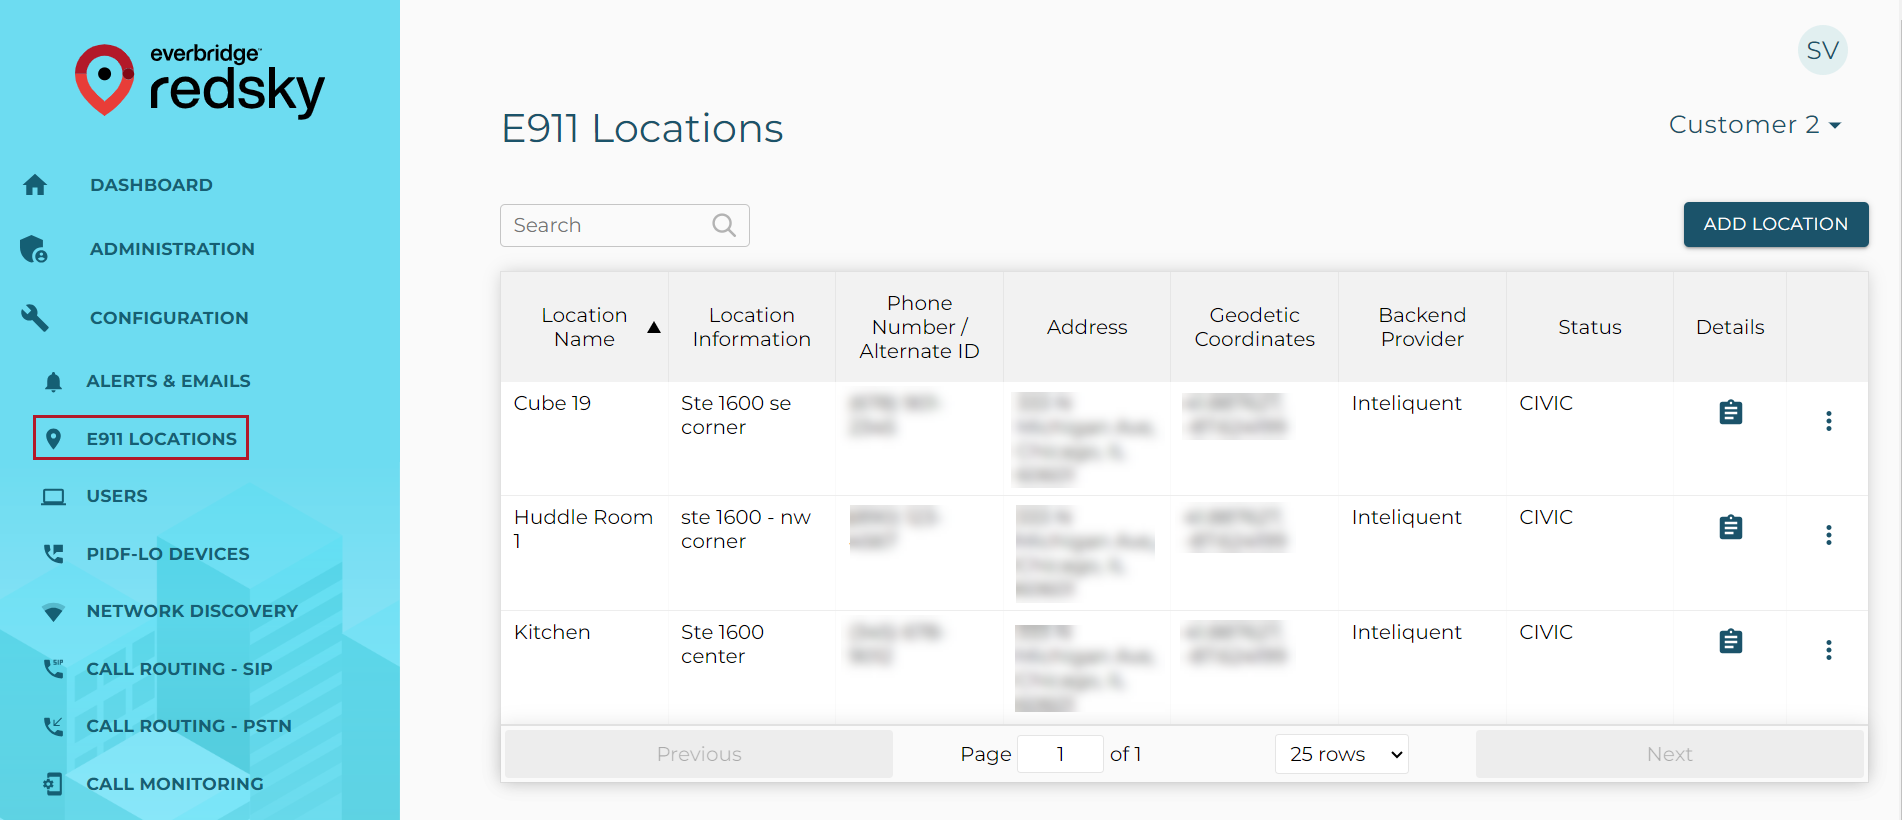
Navigate to the E911 Locations page located within the Configuration menu. A table will display the Location Name, Info, Phone Number/Alternate ID, Address, Backend Provider, and Status of each Location entry. More details about a Location can be viewed by selecting the icon in the Details column for a given Location entry.
If CER Location Management integration is enabled for your Organization, a Customer Organization Administrator will be able to view CER Locations from the CER Locations page within the Configuration menu. CER Locations cannot be managed from the portal, they are view-only.

Add Location
- Click the Add Location button at the top right of the E911 Locations page.
- Choose either the Address or Geodetic Coordinates options.
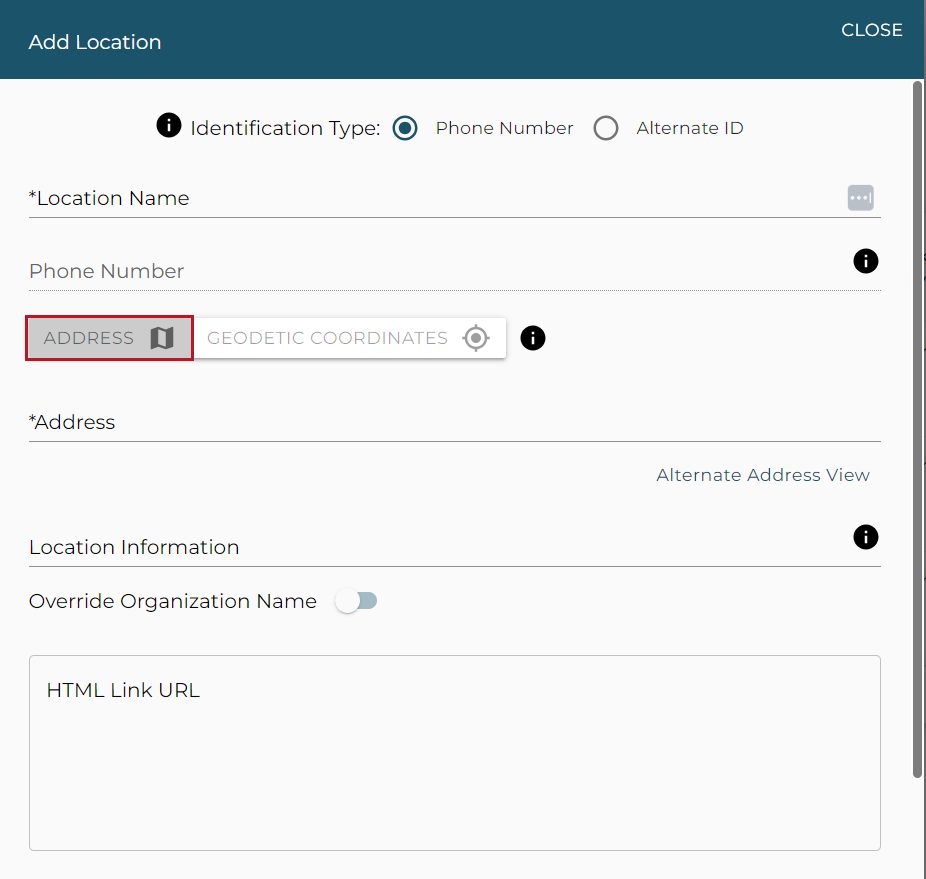
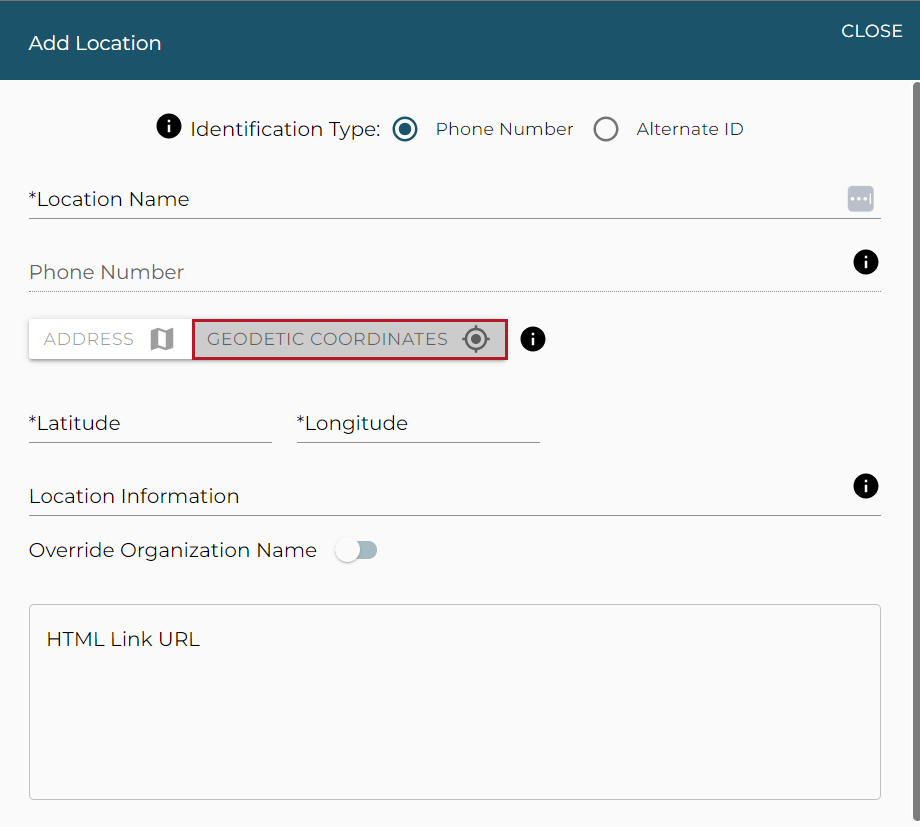
- Complete the following fields as required:
- Identification Type: Select Alternate ID if the Location does not use a phone with a traditional direct inward dial (DID) phone number.
- Name: Enter a unique name for the Location.
- Phone Number/Alternate ID: This field displays depending on the Identification Type chosen.
- Callback Number: Enter a callback number. It will override the callback number if provided by the phone system at the time of the call.
- Address or Geodetic Coordinates: Add either the street address or Geodetic Coordinates, depending on which option is being used.
- Location Information: Enter the floor, room number, suite number, or apartment number that corresponds to the Location.
- HTML Link URL: This is used to provide additional notification information. A link placed here can be used to provide a mapping display, an image, or additional Location-specific information.
- Click the Save button.
Edit a Location
- Select Edit from the Location’s action menu.
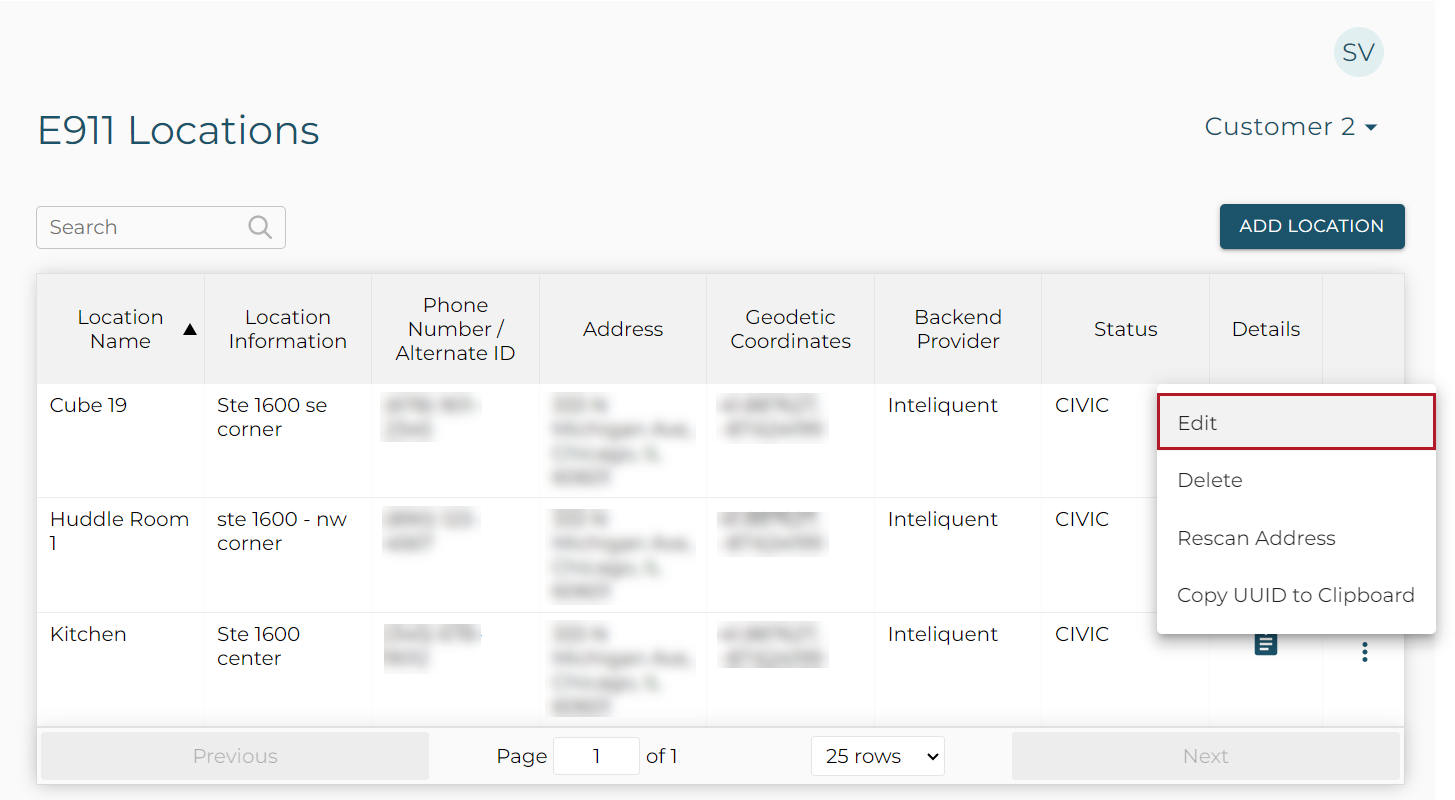
- Make changes to the following fields as needed:
- Name
- Phone Number
- Address or Geodetic Coordinates
- Location Information
- Organization Name (if Override Organization Name is selected ON)
- HTML Link URL
- Click the Save button.
Alternate Location Identification
If your Organization is configured to use Alternate Location Identifiers instead of DID phone numbers, an Alternate ID field will display in place of the Phone Number field in the Edit Location dialog box.
Delete a Location
- Select Delete from the Location’s action menu.
- Click Delete in the dialog box that displays.
Users
Softphone and HELD/HELD+ users that will be using MyE911 must be added as a User in the portal. Each User requires one User license.
User Permission Requirements
- You must be logged in as an Organization Administrator to View, Add, Edit, or Delete User entries
View Users
Navigate to the Users page located within the Configuration menu on the left sidebar. A table will display the following fields for each User entry:
- Email/HELD+ User ID
- Phone Number/Device User IDs
- First Name
- Last Name
- Current Location
- Last Access Time

If a User has not yet registered themselves via the client or web interface, their entry will be highlighted in gray as shown below.

If a User has registered via the MyE911 client or web interface but has not set their current location, they will be highlighted in red as shown below.

An Organization Administrator can click the Current Location hyperlink to view additional Location Details, as shown below.
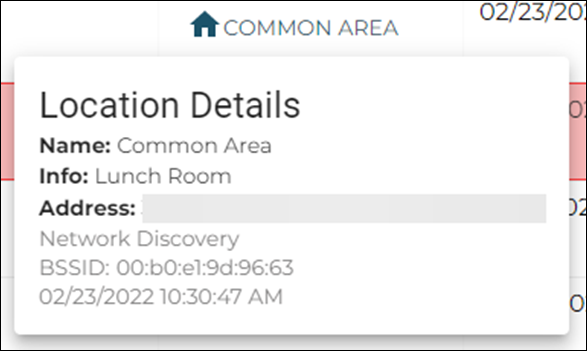
An Organization Administrator can also expand each User entry and toggle between their Locations and Devices. The Locations tab displays the Location Name, Address, and Location Info of the User's personal Locations.

The Devices tab displays the Operating System, Device Name, Device Model, Current Location, Last Access Time, and Type of Device.

Add a User
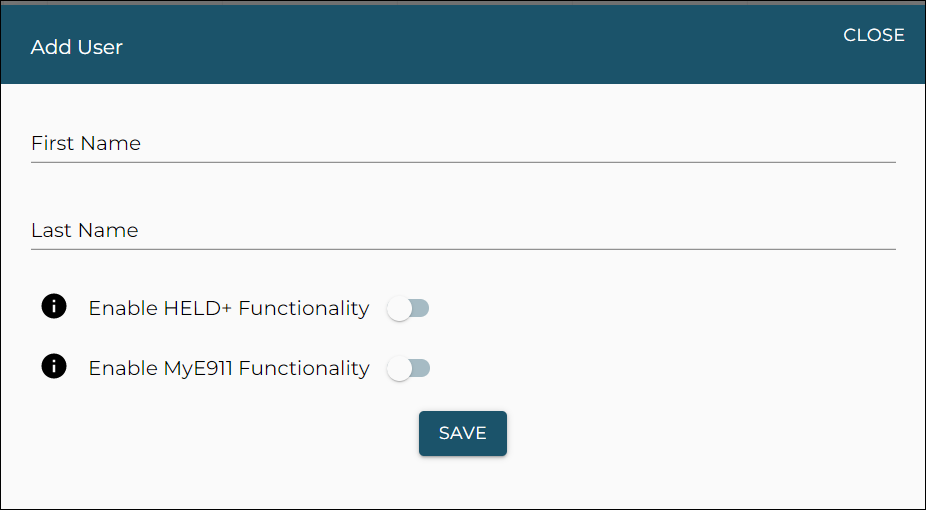
- Click the Add User button at the top right of the Users page.
- Complete the following fields as required:
- First Name
- Last Name
- Enable HELD+ Functionality
- If enabled, a field will display in which to enter your HELD+ User ID.
- Enable MyE911 Functionality
- If enabled, a field will display to enter an Email address and to select an Identification Type.
- If Phone Number is selected as the Identification Type, a Phone Number field will display.
- If Device User ID is selected as the Identification Type, a Callback Number and Device User ID field will display.
- If enabled, a field will display to enter an Email address and to select an Identification Type.
- Click the Save button.
Edit a User
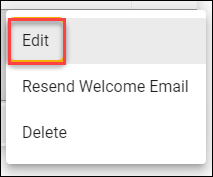
- Select Edit from the User entry's action menu.
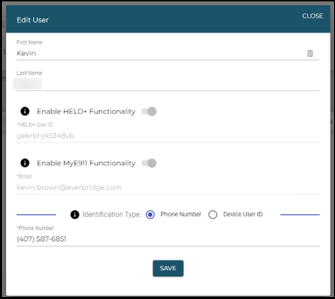
- Make changes to the following fields as needed:
- First Name
- Last Name
- Identification Type (for Users with MyE911 Functionality enabled)
- For Users who select Phone Number as their Identification Type, the Phone Number field is editable.
- For Users who select Device User ID as their Identification Type, the Callback Number, and Device User ID fields are editable.
- Click the Save button.
Delete a User
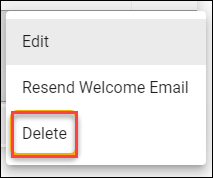
- Select Delete from the User entry's action menu.
- Click Delete in the dialog box that displays.
Network Discovery
In order for a Customer Organization’s employees to be accurately located as they move throughout the day, each Location entry must be mapped to a network element, such as IP Subnet, Network Switch, or Access Point. This Network Discovery, or wire mapping, must be configured in the portal.
A Customer Organization Administrator is responsible for configuring Network Discovery.
Network Discovery Permission Requirements
You must be logged in as an Organization Administrator to View, Add, Edit, or Delete any network elements.
View Network Discovery
Navigate to the Network Discovery page located within the Configuration menu on the left sidebar. A table will display the following fields for each network entry:
- MAC tab
- MAC Address
- Location
- Description
- LLDP tab
- Description
- Identifier
- Location
- BSSID tab
- BSSID
- Location
- Description
- IP RANGES tab
- Range Start
- Range End
- Location
- Description

A search capability is available for MAC, LLDP Chassis and BSSID elements. There is also an option to show only unmapped LLDP Chassis and BSSID added by a HELD, HELD+, or MyE911 request if configured for the Organization.
MAC Addresses
Add MAC Address Mapping
- Select the MAC tab from the top bar on the Network Discovery page.
- Click the Add MAC Address Mapping button at the top right of the Network Discovery page.
- Complete the following fields as required:
- MAC Address (represented as a string of 12 hexadecimal digits)
- Building
- Location (will display when a Building is selected)
- Description (if desired)
- Click the Save button.

If the Building or Location you want to select does not appear in the dropdown, you will need to add it as a new Building or Location entry.
If your Organization is configured with a Location Only Location Hierarchy Type, you will be able to add a Location on the fly, from the Add MAC Address Mapping dialog box. This option will appear as a tab labeled Add Location in the Add MAC Address Mapping dialog box. This option will not display if the Organization is configured with a Building and Location Location Hierarchy Type.
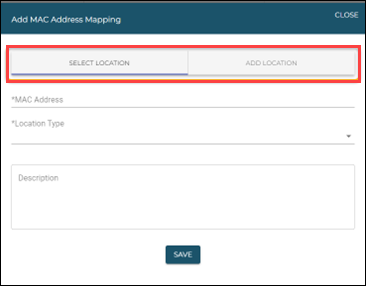
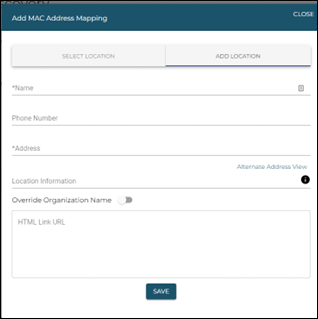
When adding a Location via the Add MAC Address Mapping dialog box, do the following:
- Select the Add Location tab.
- Complete the following fields as required:
- Name
- Address
- Location Information
- Click the Save button.
- Return to the Select Location tab where your added Location should now be available from the dropdown menu.
Edit MAC Address Mapping
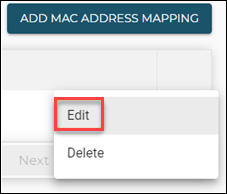
- Select Edit from the MAC Address entry's action menu.
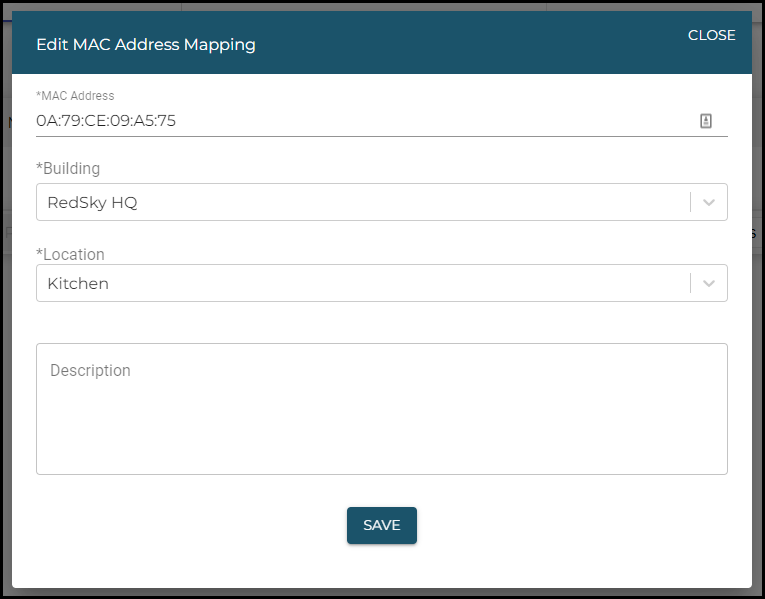
- Make changes to the following fields as needed:
- MAC Address
- Building
- Location
- Description (if necessary)
- Click the Save button.
Delete MAC Address Mapping
- Select Delete from the MAC Address entry's action menu.
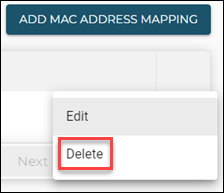
- Click Delete in the dialog box that displays.
Chassis Mapping (LLDP)
Add Chassis Mapping
- Select the LLDP tab from the top bar on the Network Discovery page.
- Click the Add Chassis Mapping button at the top right of the Network Discovery page.
- Complete the following fields as required:
- Identifier (MAC address)
- Building
- Description
- Click the Save button.
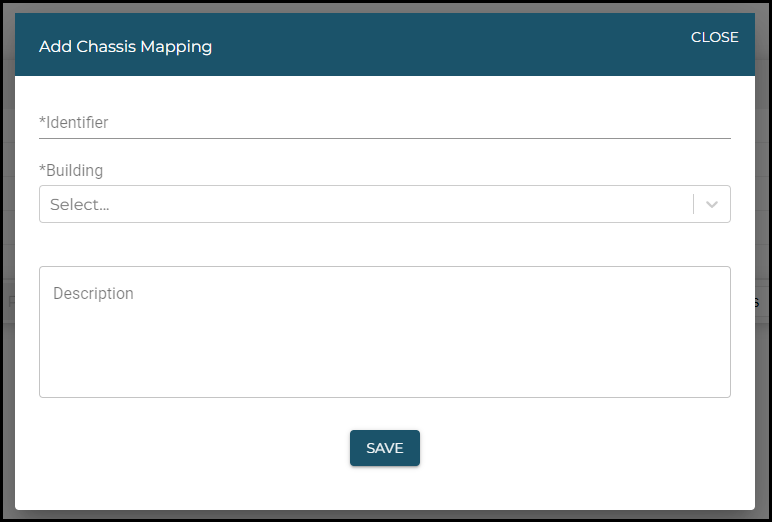
If the Building or Location you want to select does not appear in the dropdown, you will need to add it as a new Building or Location entry.
If your Organization is configured with a Location Only Location Hierarchy Type, you will be able to add a Location on the fly, from the Add Chassis Mapping dialog box. This option will appear as a tab labeled Add Location in the Add Chassis Mapping dialog box. This option will not display if the Organization configured with a Building and Location Location Hierarchy Type.
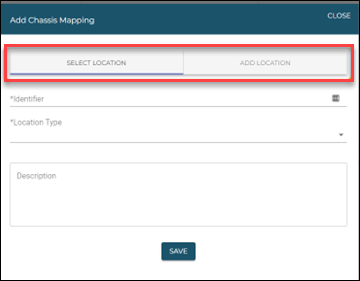
Edit Chassis Mapping
- Select Edit from the LLDP entry's action menu.

- Make changes to the following fields as needed:
- Identifier
- Building
- Location
- Description
- Click the Save button.
Delete Chassis Mapping
- Select Delete from the LLDP entry's action menu.
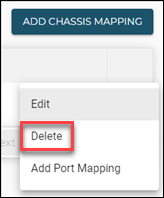
- Click Delete in the dialog box that displays.
Add Port Mapping
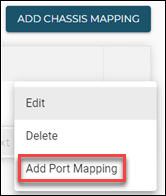
- Select Add Port Mapping from the LLDP entry's action menu for which you want to add a port.
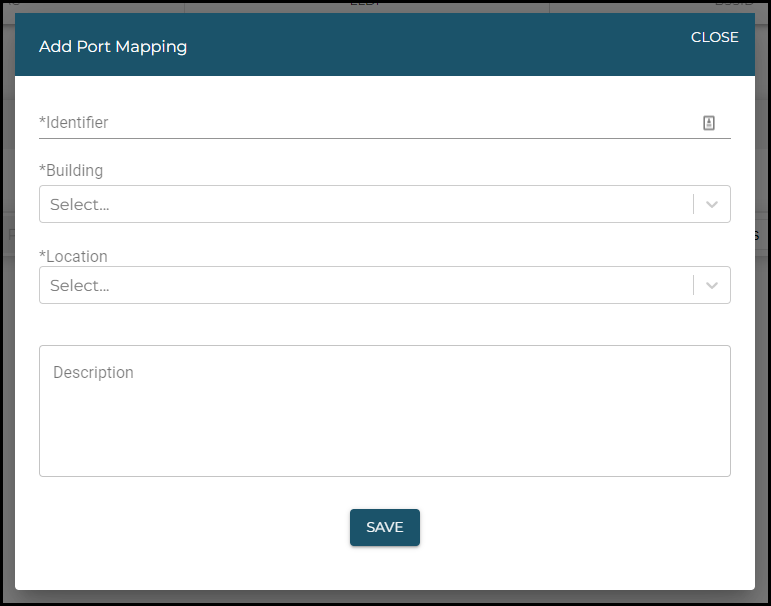
- Complete the following fields as required:
- Identifier (MAC address)
- Building
- Location
- Description
- Click the Save button.
If the Building or Location you want to select does not appear in the dropdown, you must add it as a new Building or Location entry.
If your Organization is configured with a "Location Only" Location Hierarchy Type, you will be able to add a Location on the fly, from the Add Port Mapping dialog box. This option will appear as tab labeled "Add Location" in the Add Port Mapping dialog box. This option will not display if the Organization configured with a "Building and Location" Location Hierarchy Type.

Edit Port Mapping
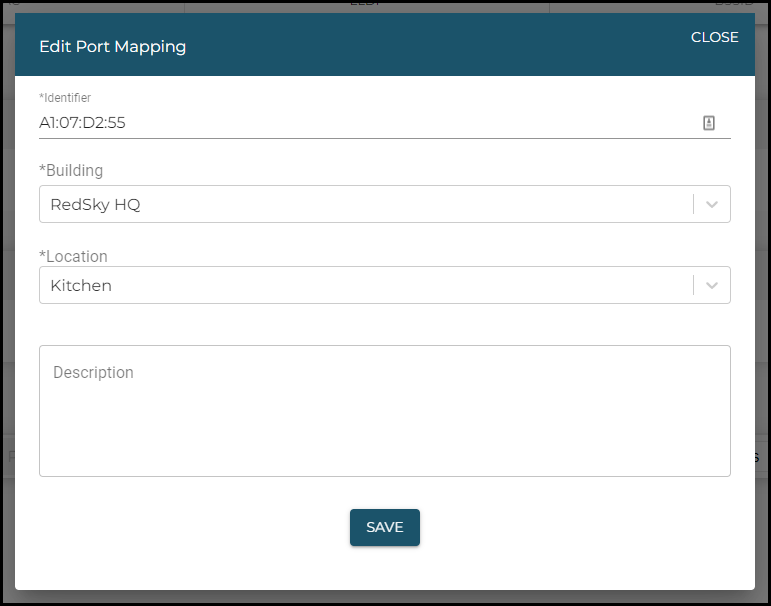
- Select Edit from the LLDP entry's Port Mapping action menu for which you want to edit a port.

- Make changes to the following fields as required:
- Identifier (MAC Address)
- Building
- Location
- Description
- Click the Save button.
Delete Port Mapping
- Select Delete from the LLDP entry's Port Mapping action menu.

- Click Delete in the dialog box that displays.
BSSID
Add BSSID Mapping
- Select the BSSID tab from the top bar on the Network Discovery page.
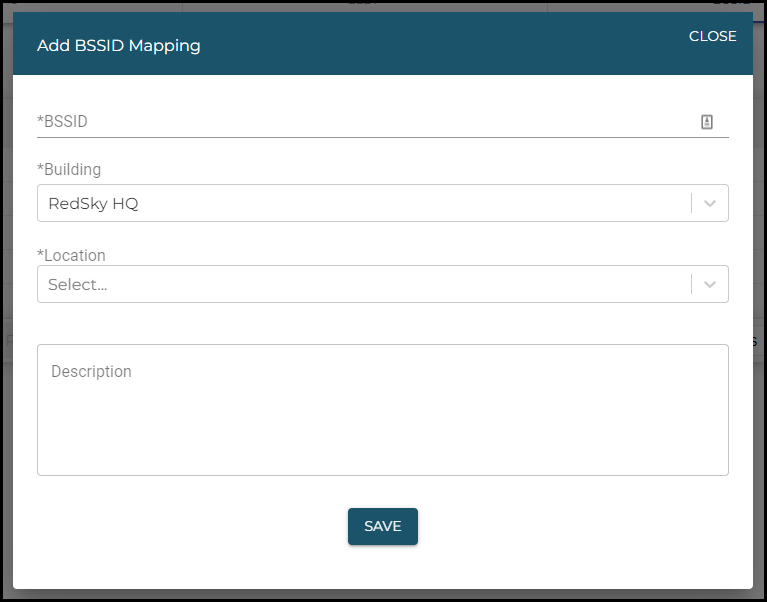
- Click the Add BSSID Mapping button at the top right of the Network Discovery page.
- Complete the following fields as required:
- BSSID
- Building
- Location
- Description
- Click the Save button.
If the Building or Location you want to select does not appear in the dropdown, you will need to add it as a new Building or Location entry.
If your Organization is configured with a Location Only Location Hierarchy Type, you will be able to add a Location on the fly, from the Add BSSID Mapping dialog box. This option will appear as a tab labeled Add Location in the Add BSSID Mapping dialog box. This option will not display if the Organization configured with a Building and Location Location Hierarchy Type.
Edit BSSID Mapping
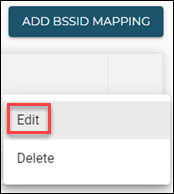
- Select Edit from the BSSID entry's action menu.
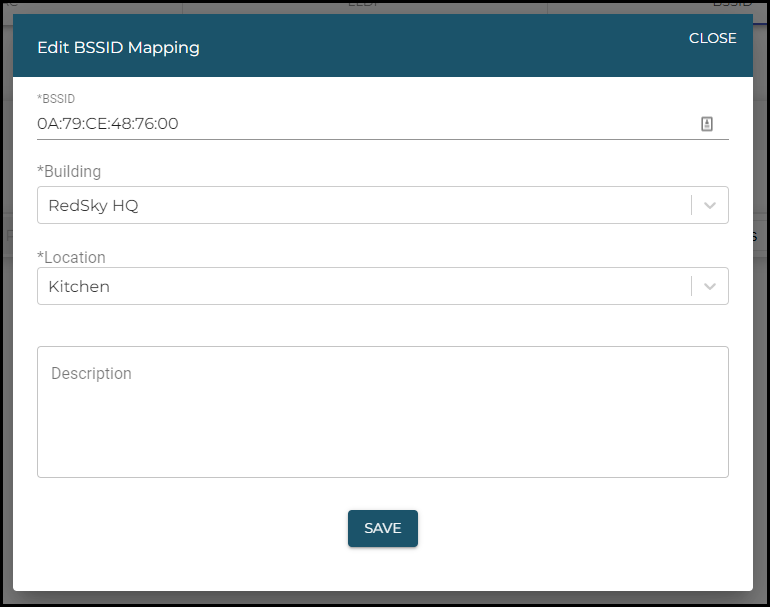
- Make changes to the following fields as needed:
- BSSID
- Building
- Location
- Description
- Click the Save button.
Delete BSSID Mapping
- Select Delete from the BSSID entry's action menu.

- Click Delete in the dialog box that displays.
IP Ranges
Add Private IP Range Mapping
A Private IP Range Mapping can be created from this tab. To do so:
- Select the IP Ranges tab from the top bar on the Network Discovery page.
- Click the Add IP Range Mapping button at the top right of the Network Discovery page.
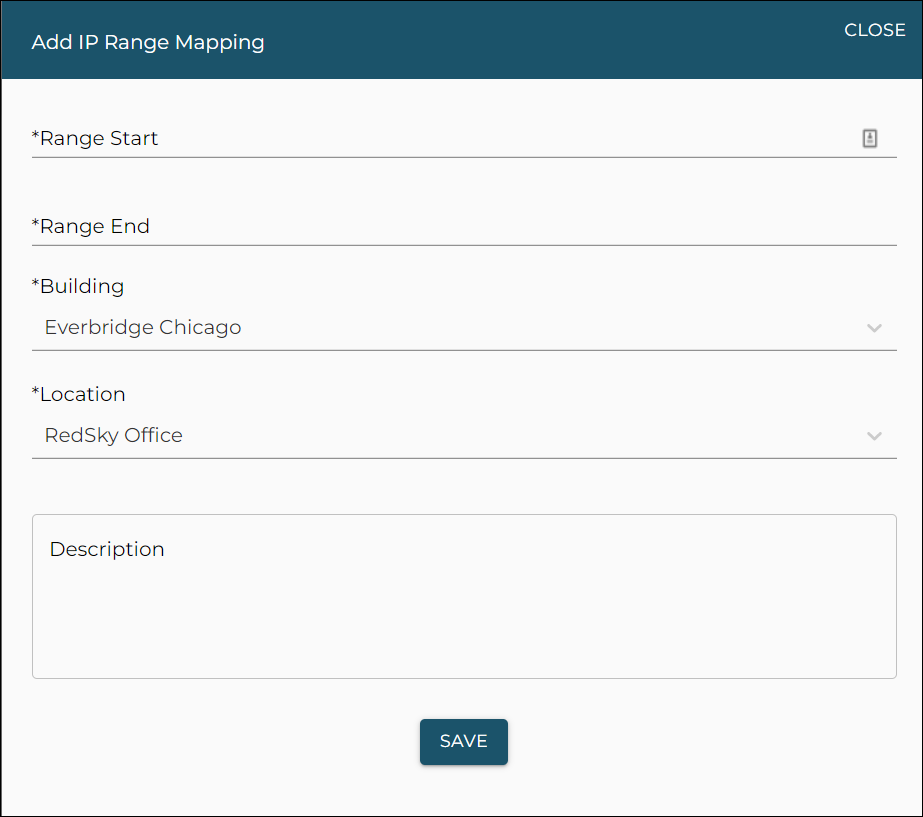
- Complete the following fields as required:
- Range Start
- Range End
- Building
- Location
- Description
- Click the Save button.
If the Building or Location you want to select does not appear in the dropdown, you must add it as a new Building or Location entry.
If your Organization is configured with a Location Only Location Hierarchy Type, you will be able to add a Location on the fly, from the Add IP Range Mapping dialog box. This option will appear as a tab labeled Add Location in the Add IP Range Mapping dialog box. This option will not display if the Organization configured with a "Building and Location" Location Hierarchy Type.
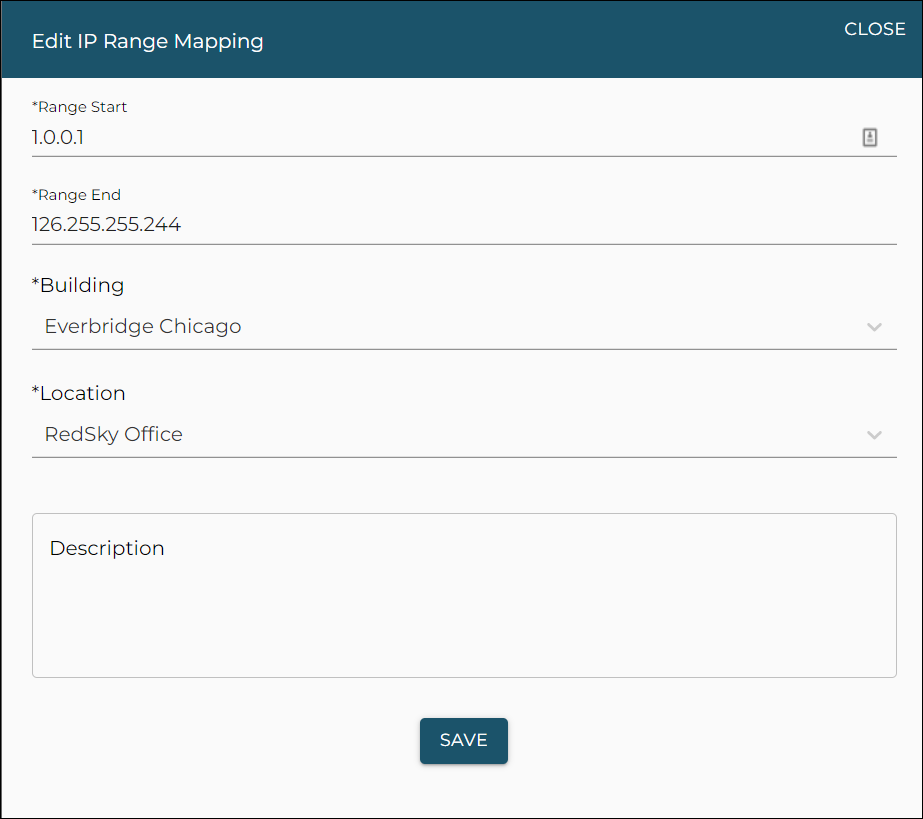
Edit IP Range Mapping
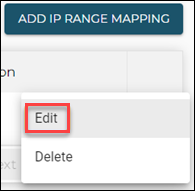
- Select Edit from the IP Range entry's action menu.
- Make changes to the following fields as needed:
- Range Start
- Range End
- Building
- Location
- Description
- Click the Save button.
Delete IP Range Mapping
- Select Delete from the IP Range entry's action menu.
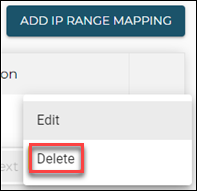
- Click Delete in the dialog box that displays.
Call Monitoring
If your Organization possesses an Enhanced Notification license, an Organization Administrator will be able to configure Call Monitoring.
Call Monitoring allows an Organization Administrator to designate a phone number to be added to an emergency call at the time it is happening. This functionality allows security desks or other designated personnel to listen to the emergency call in real-time.
Additionally, once the designated phone number has been added into an emergency call, the designated personnel can barge into the call by dialing *1. This feature allows the designated personnel to speak as well as listen to the emergency call.
Configure a Phone Number for Call Monitoring
- Navigate to the Call Monitoring page located within the Configuration menu on the left sidebar.
- Click the Configure button at the top right of the Call Monitoring page.
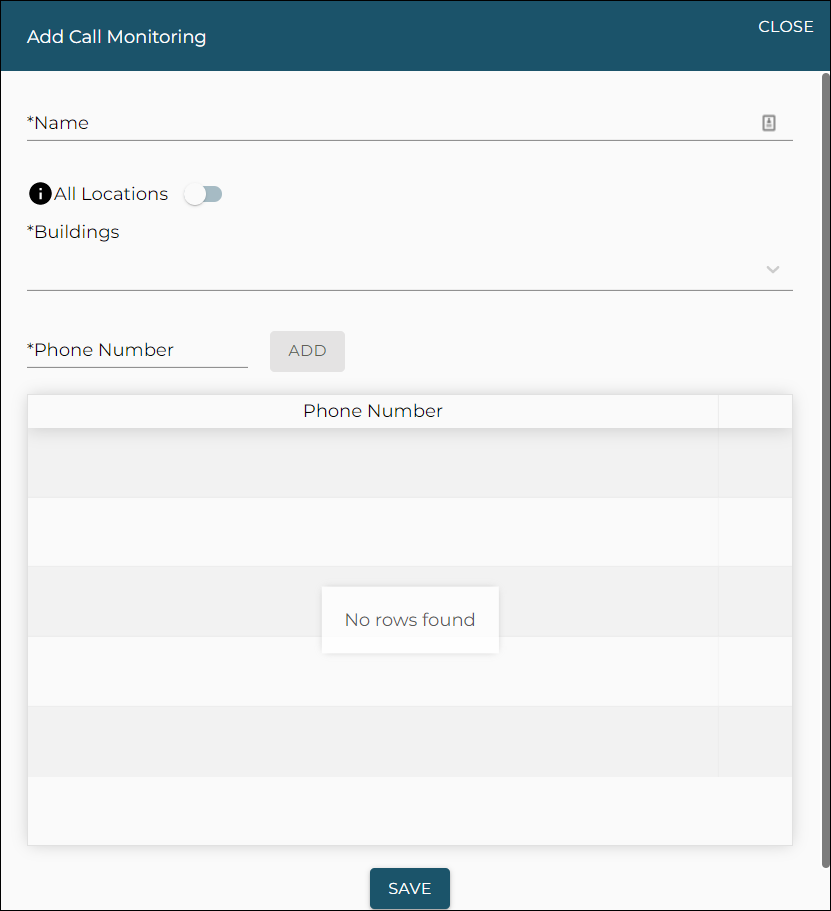
- Complete the following fields as required:
- Name
- All Buildings toggle
- If toggled ON, the Building dropdown field will no longer be selectable, as all Building entries are selected.
- Building dropdown
- Only available if the All Buildings toggle is selected OFF.
- Phone Number
- Click Add to commit a phone number to the list within the Add Call Monitoring dialog box.
- Click the Save button.
Edit Call Monitoring Configuration
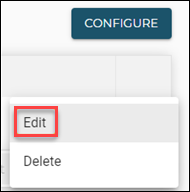
- Select Edit from the Call Monitoring entry's action menu.
- Make changes to the following fields as required:
- Name
- Building
- Phone Number
- Click the Save button.
Delete a Call Monitoring Configuration
- Select Delete from the Call Monitoring entry's action menu.
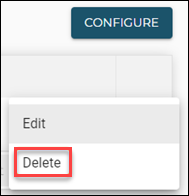
- Click Delete in the dialog box that displays.
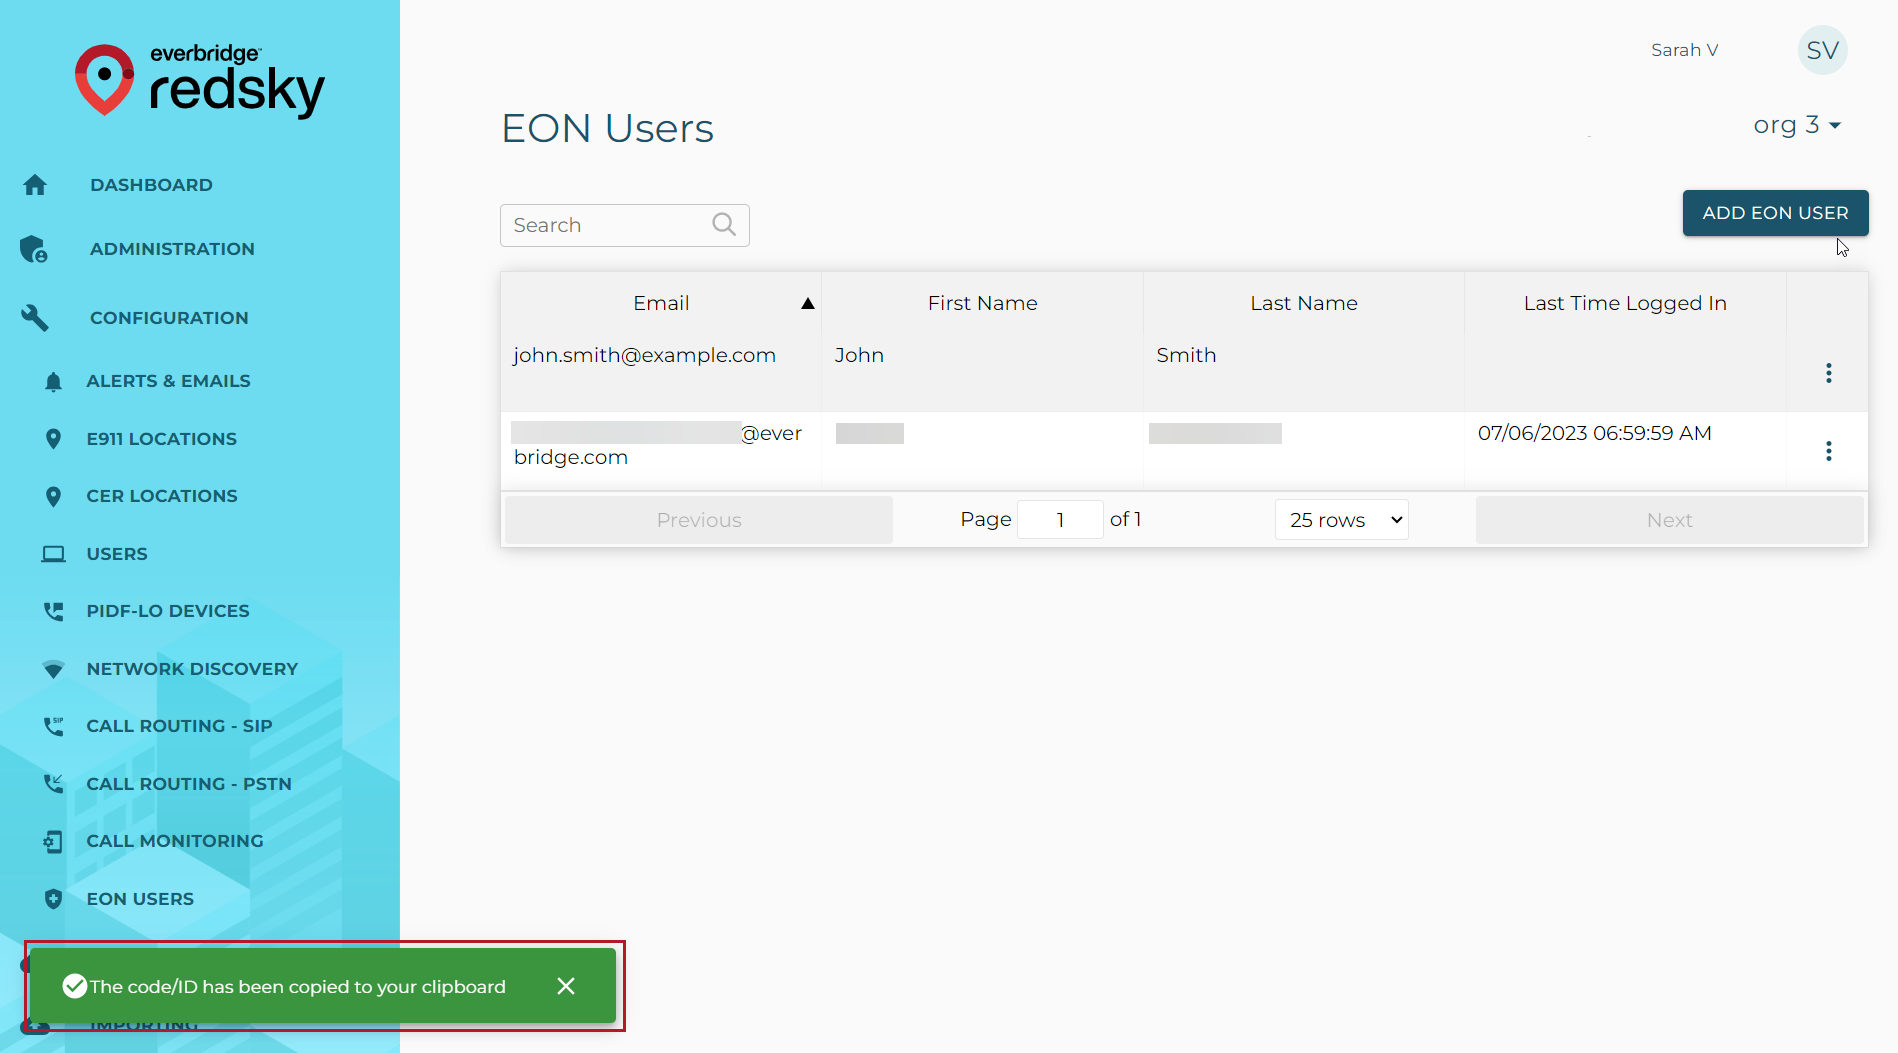
EON Users
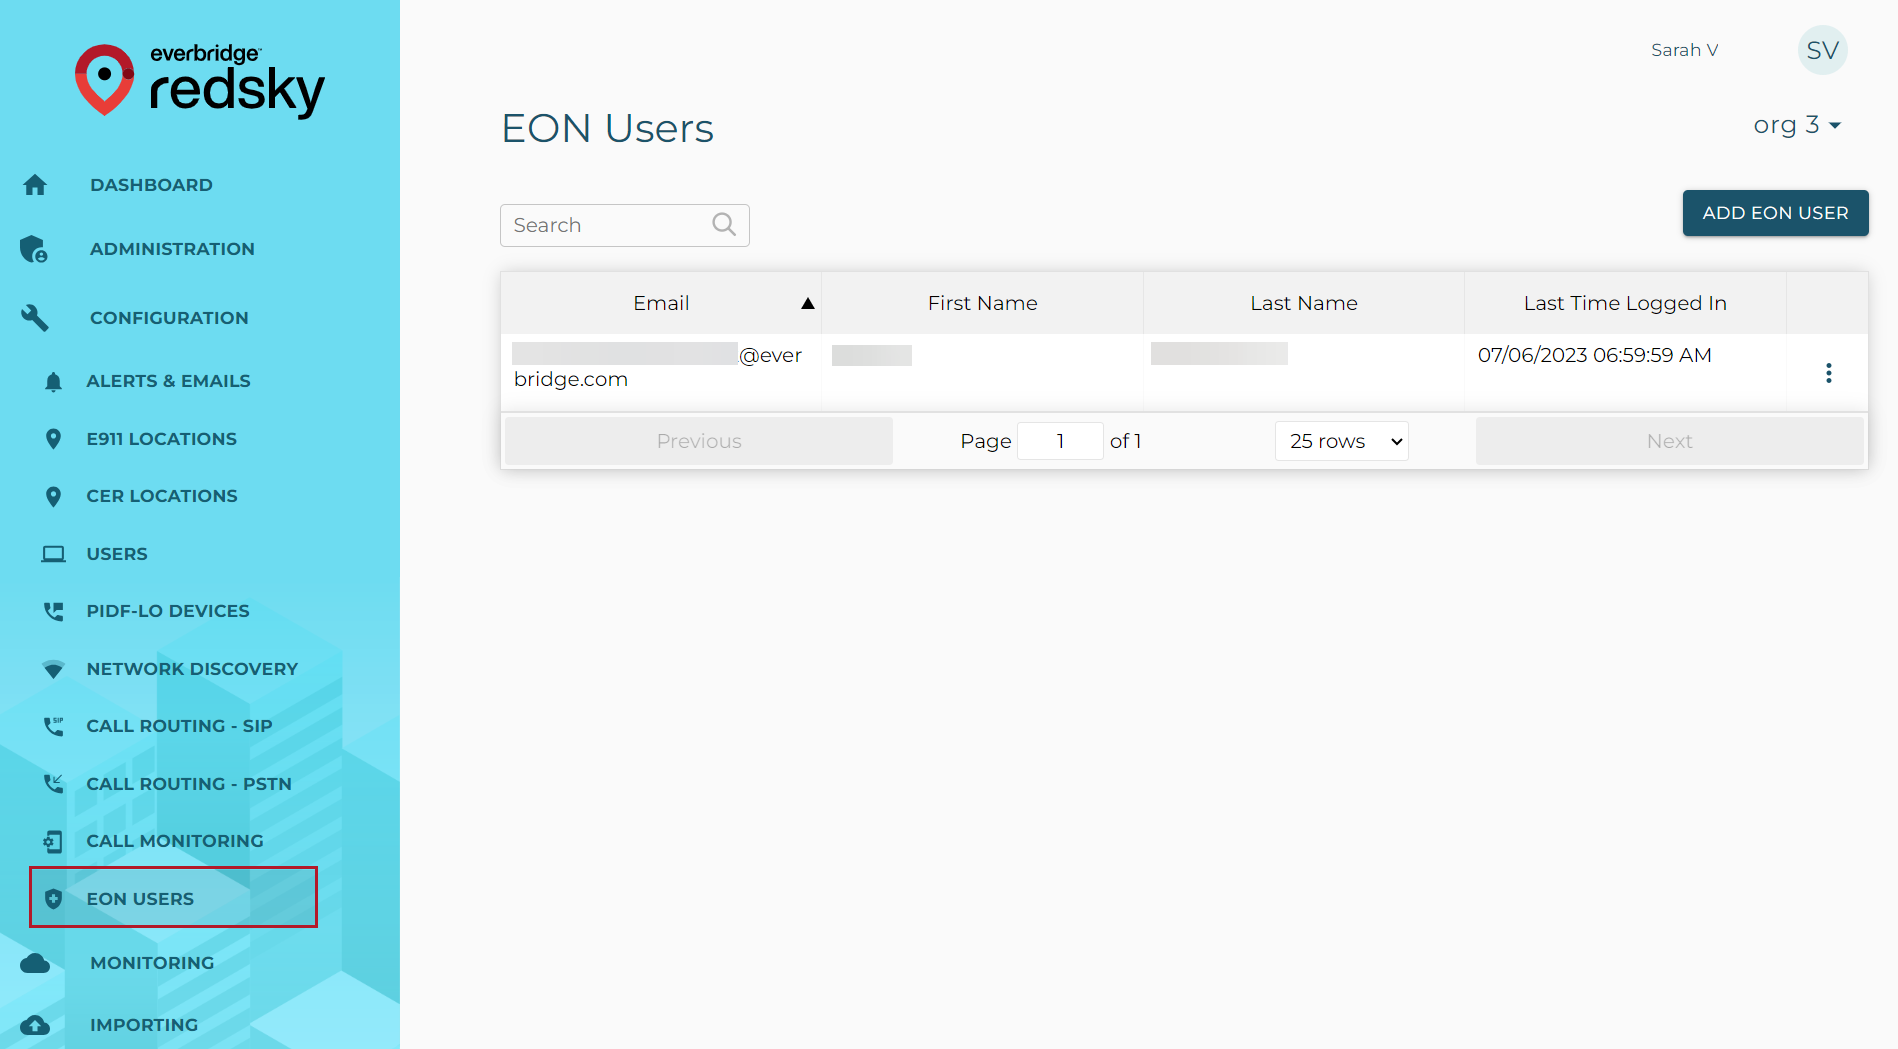
The EON Users section provides a list of all EON users within an Organization, as well as the ability to add, edit, or delete EON users.
Add EON User
EON Users can be added directly from this page, which is recommended if the new user doesn't need Administrator privileges. If an EON user does require Administrator privileges, then they should instead be added via the Administrators tab.
To add an EON user:
- From the EON Users page, click Add EON User.
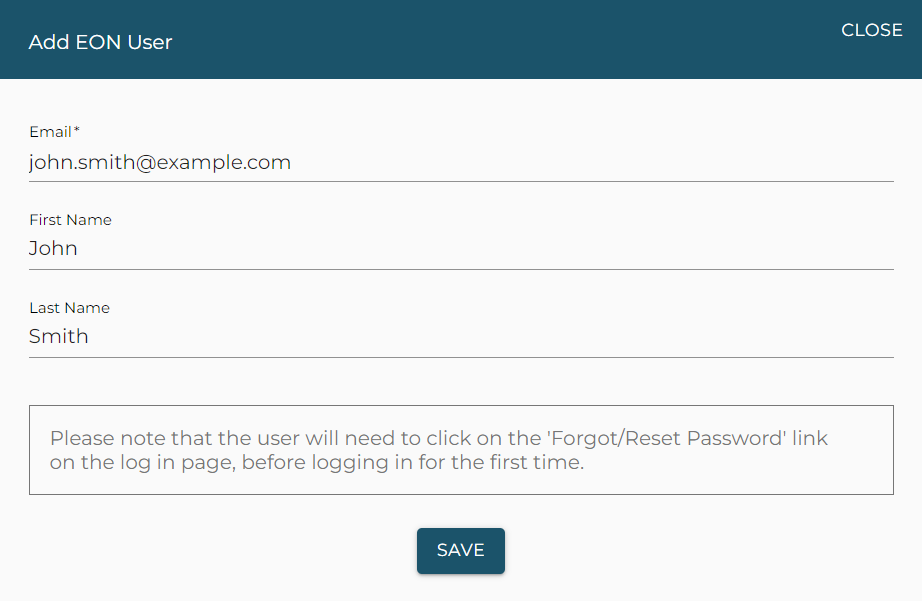
- The Add EON User modal will appear. Enter the new EON user's email address and name.
- Click Save.
Edit EON User
To edit an EON user:
- Click the three-dot menu icon for the user that needs to be edited and select Edit.
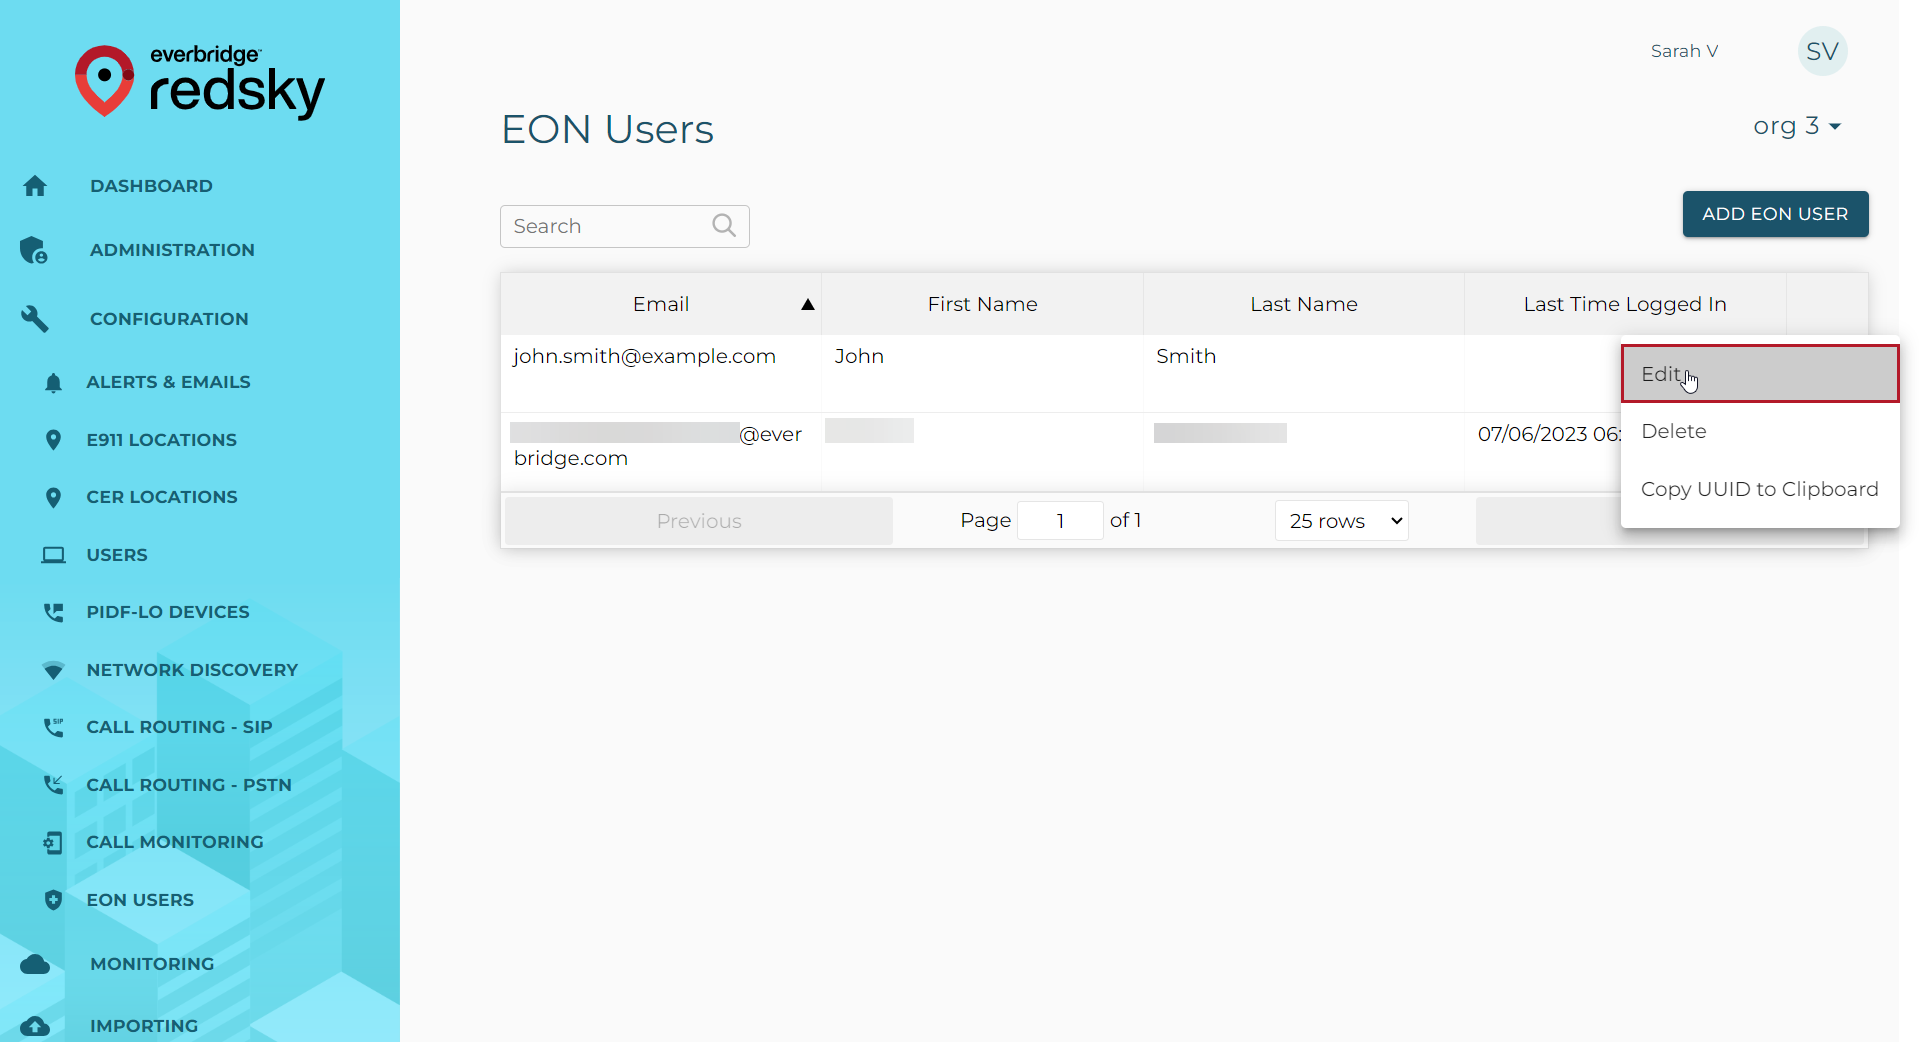
- The Edit EON User modal appears. Make the needed changes to the email address or name.
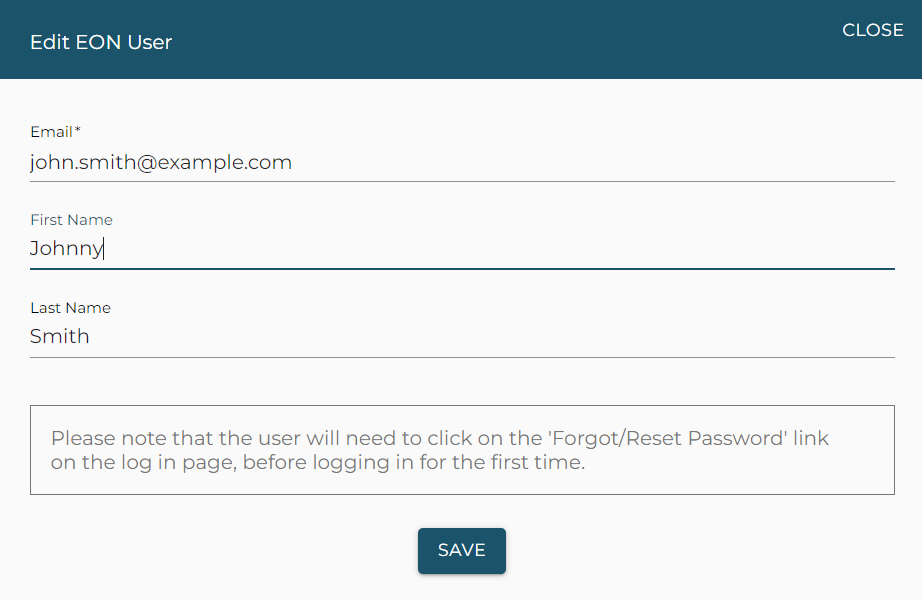
- Click Save.
Delete EON Users
To delete an EON user:
- Click the three-dot menu icon for the user that needs to be edited and select Delete.
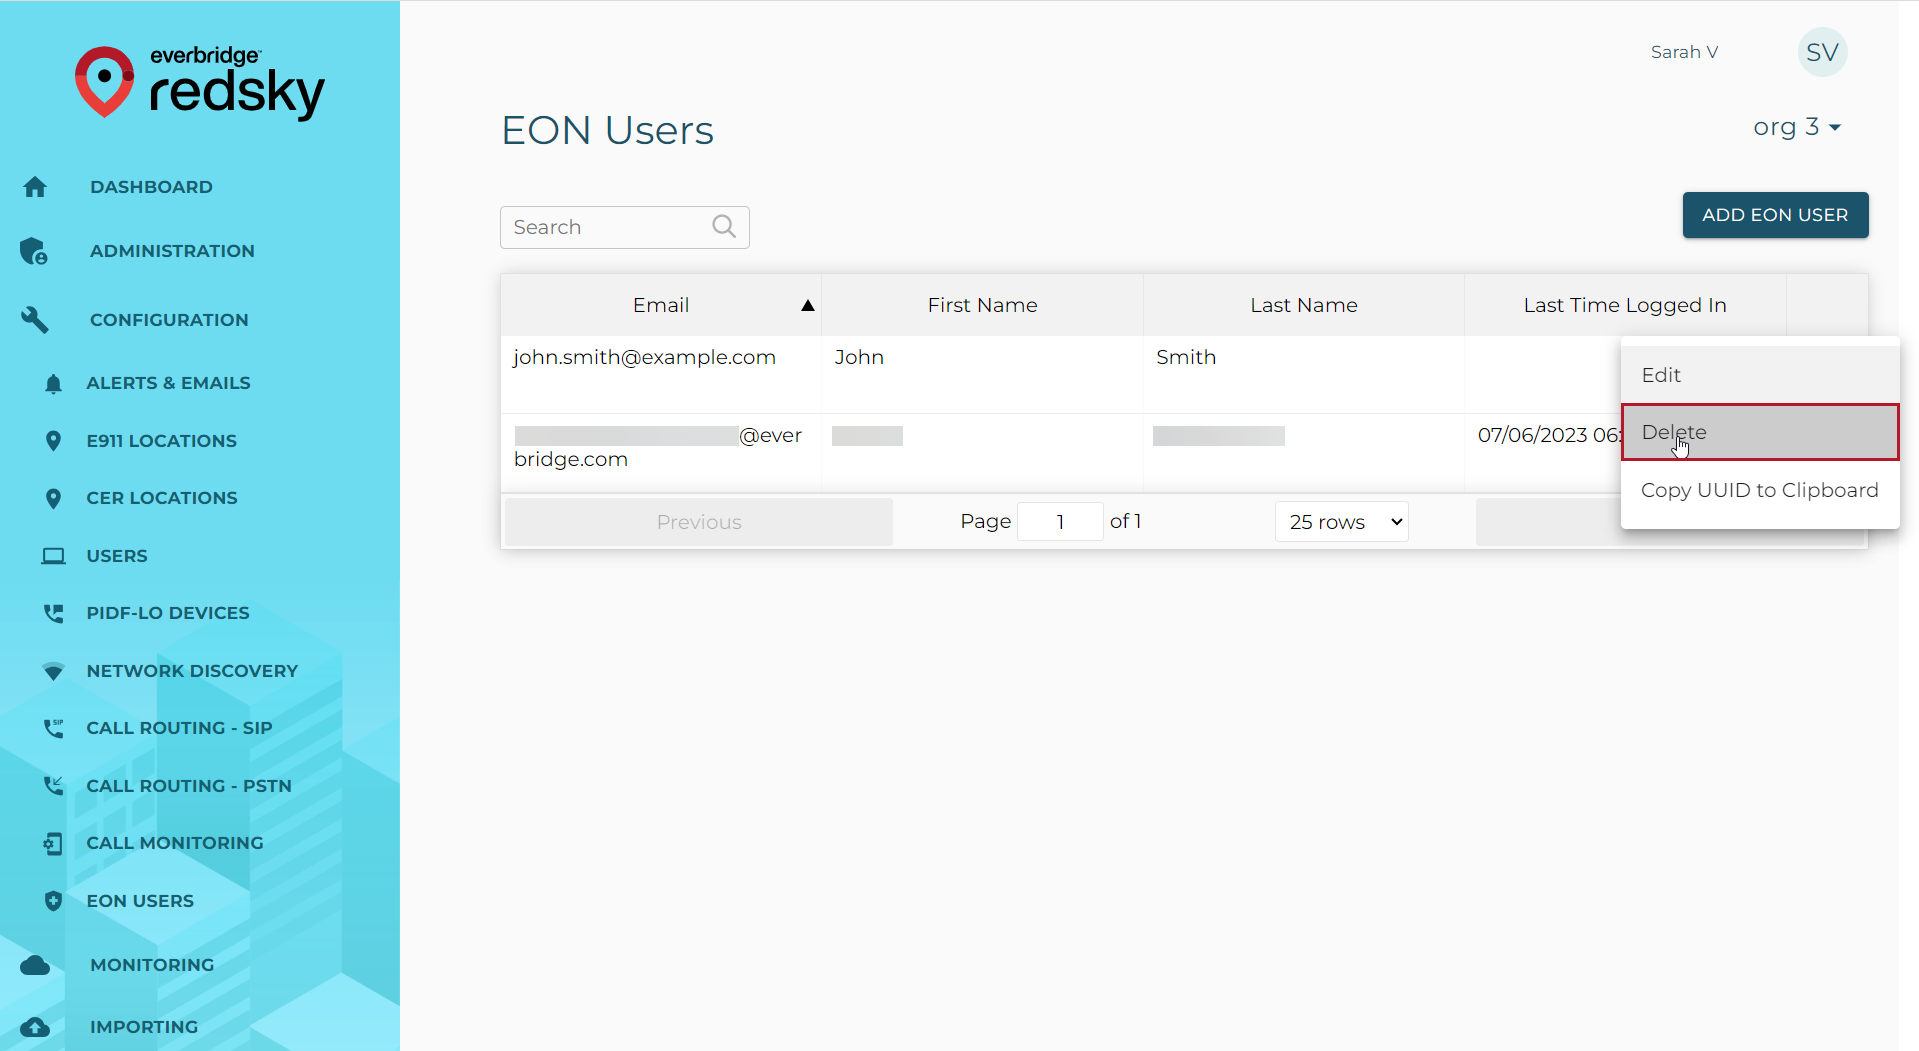
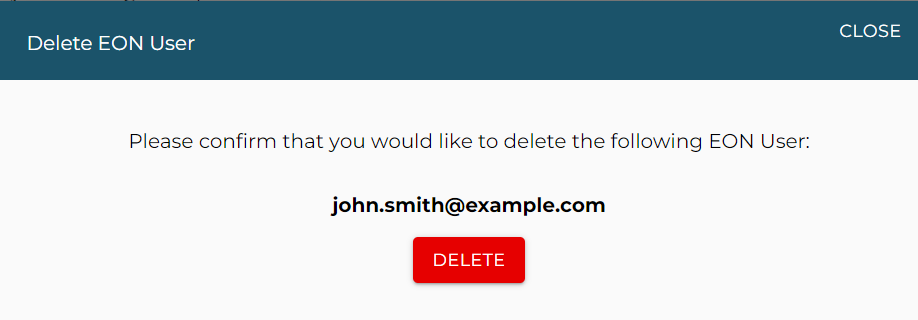
- The Delete EON User confirmation modal will appear, along with a preview of the user that's about to be deleted. Click DELETE to proceed with removing the user.
Copy UUID to Clipboard
If needed, the EON User's UUID can be copied directly to the clipboard by clicking the three-dot icon and selecting Copy UUID to Clipboard. A green confirmation message will appear in the bottom-left corner of the screen once the data has been saved to the clipboard.
